For all our wisdom about El Chaltén, go and see this. For Huemul-specific enlightenment, please proceed here.
-Before starting the trek you are supposed to fill out a rather lengthy form for the national park officials.
-Upon return, drop an email to icepnlgzn@apn.gob.ar and report back so they don‘t send helicopters looking for you.
-There’s also a .pdf explaining some of the intricacies of the trail.
-Mirador los Condores and the Huemul Circuit (if done counter clockwise) share the same trailhead. So if you want to avoid the 45$ entrance fee, show up before 7am.
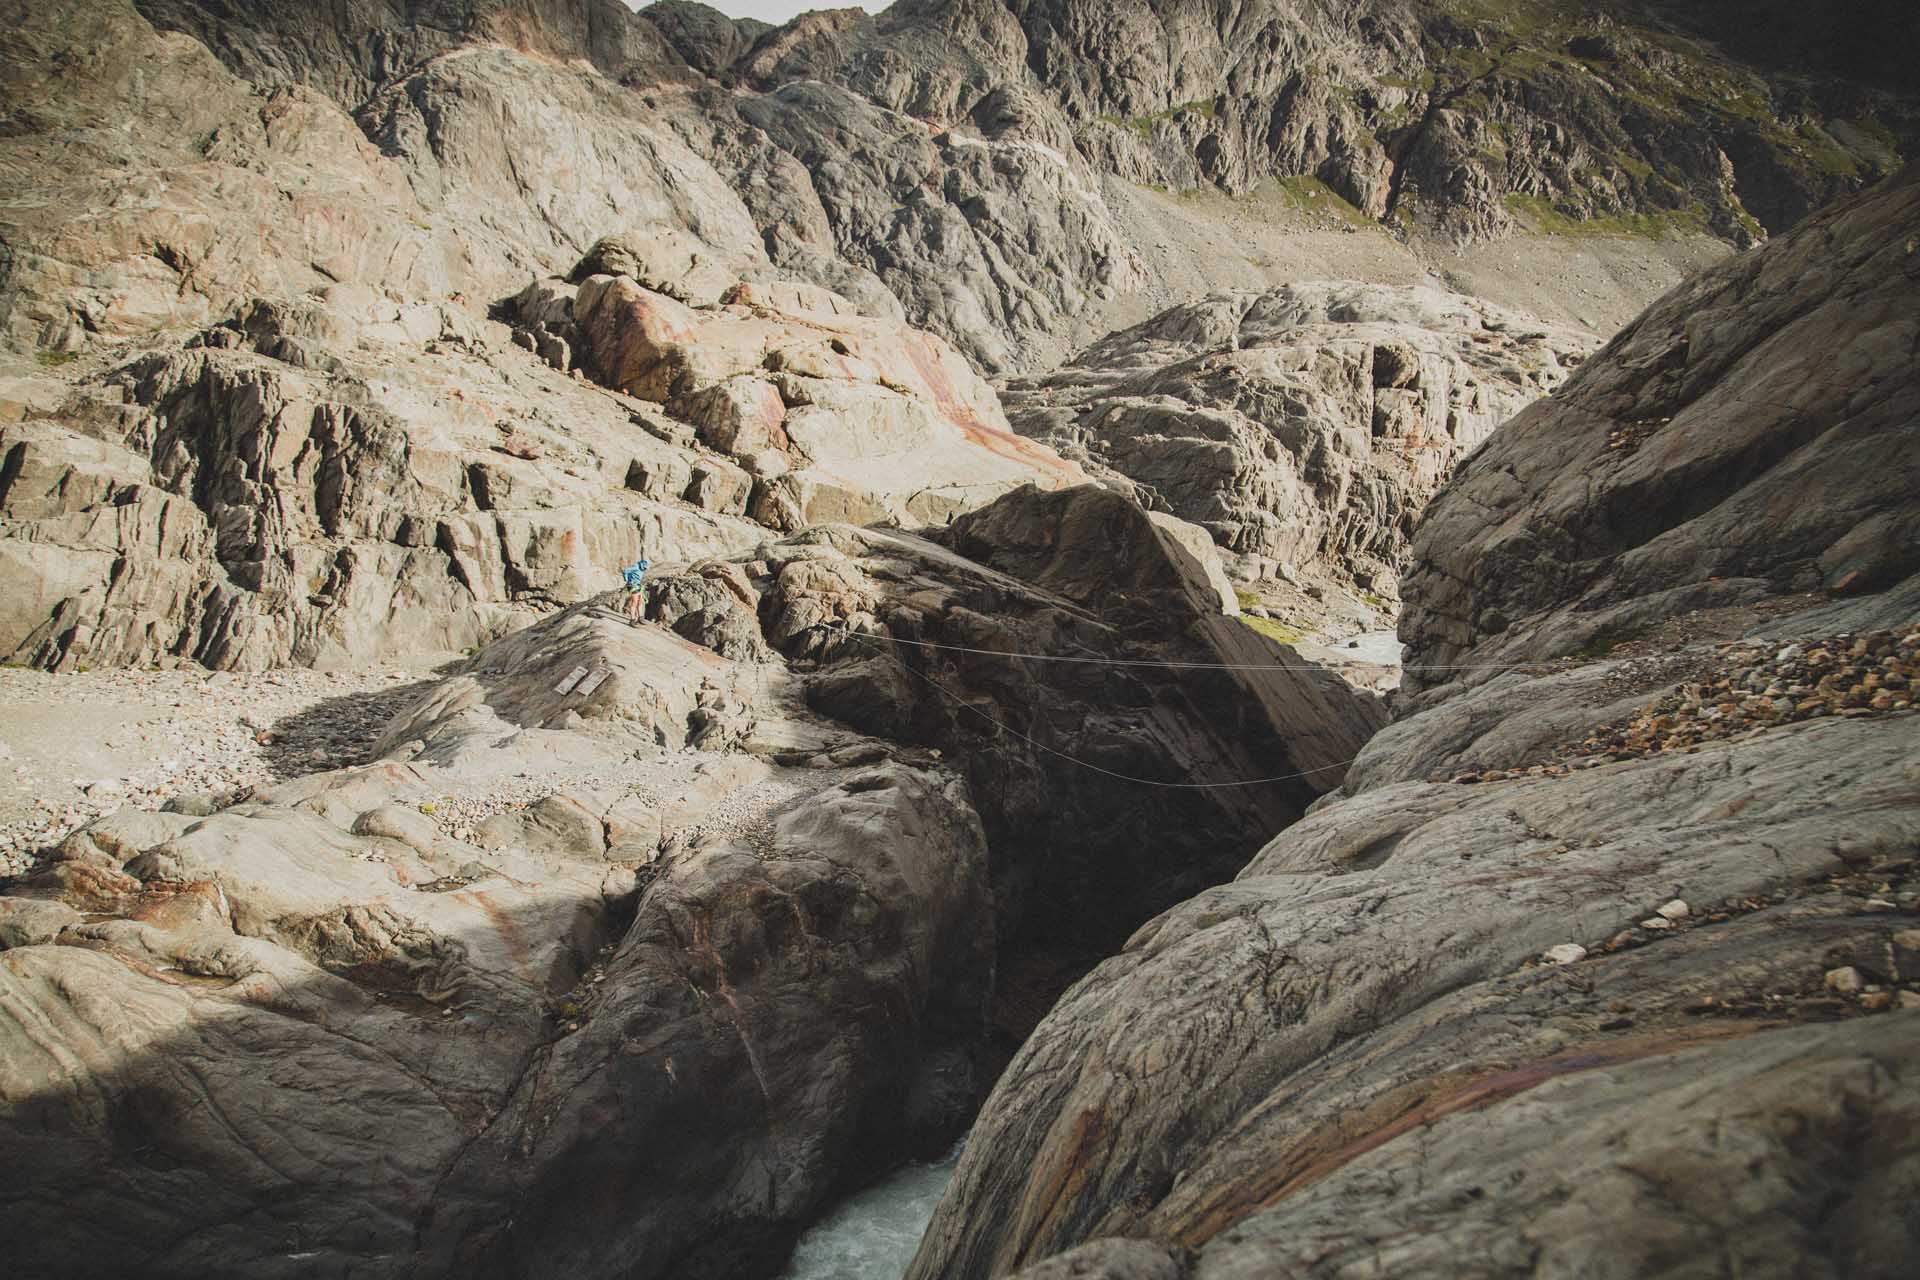
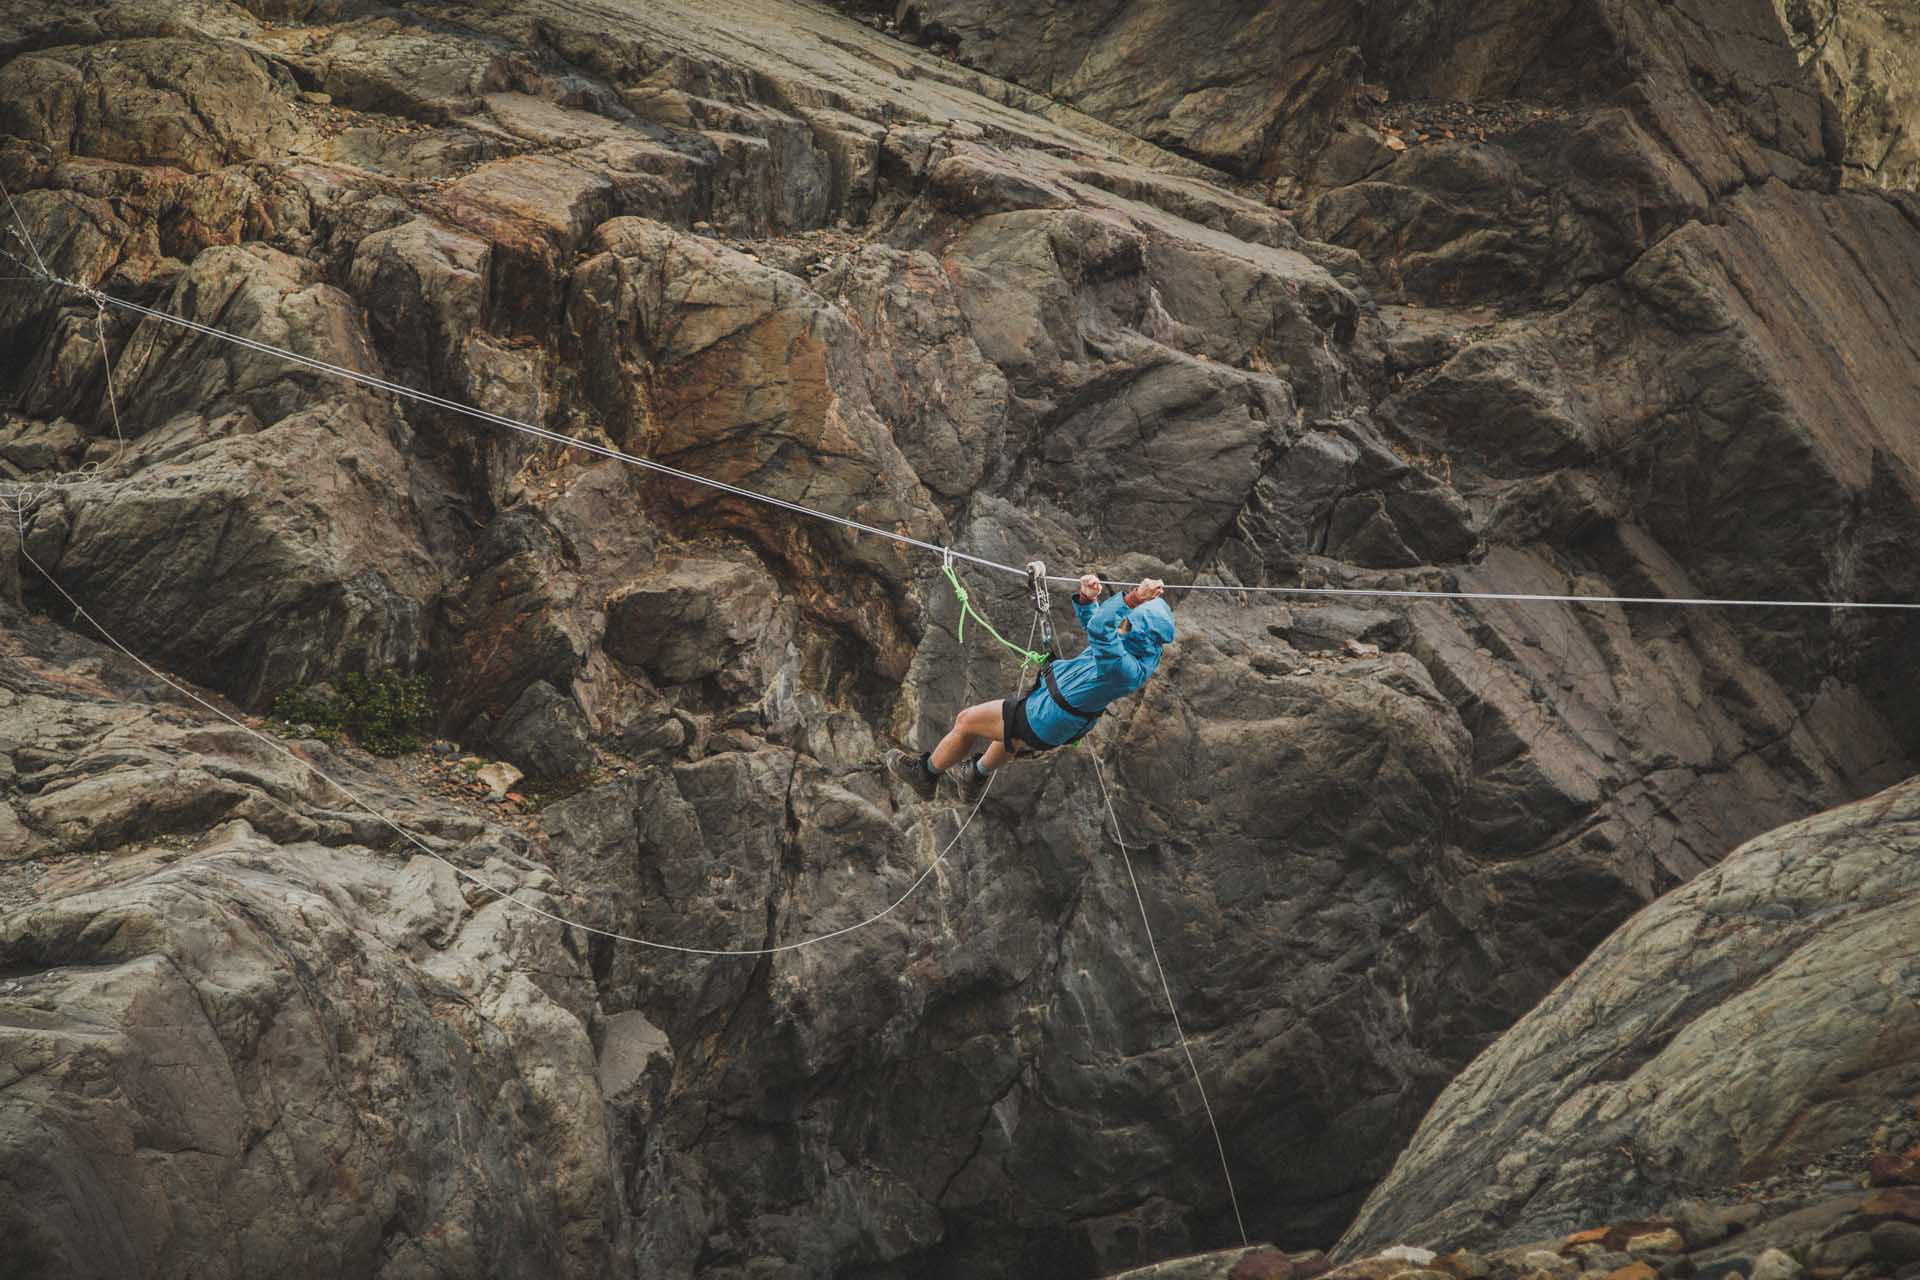
-There are two tirolesas. So either bring your own harness, carabiners, daisy chain and a thin rope or rent them at one of the numerous establishments along El Chaltén’s Avenida San Martin. We suspect that rental prices go down the further north a shop is located on San Martin. We can recommend Viento Oeste.
-Bajo Zero also has rental gear and they have lockers for your excess luggage should you be in need.
We always carried one liter of water for two people. There are plenty of refill possibilities so there’s no need for big bottles.
-Check the weather! We found the windy app to be surprisingly accurate. More so than the meterological insights of the locals. Huemul Circuit is one of the few treks in Patagonia where the weather can actually force you to turn back. Which is what happened on our first of two attempts.
-In advance, we read many reports about the trek and felt like some of them were exaggerating its difficulty, thus greatly influencing our decisions. For better or worse, we don’t know. But ultimately it‘s always down to your own judgement and gut feeling, I guess.

Stats
In it‘s recommended version, the Huemul Circuit is a 65km loop with 2700m of elevation done counter clockwise over four days. You can also do it the other way round.
How to get there
Go see this.
The hike
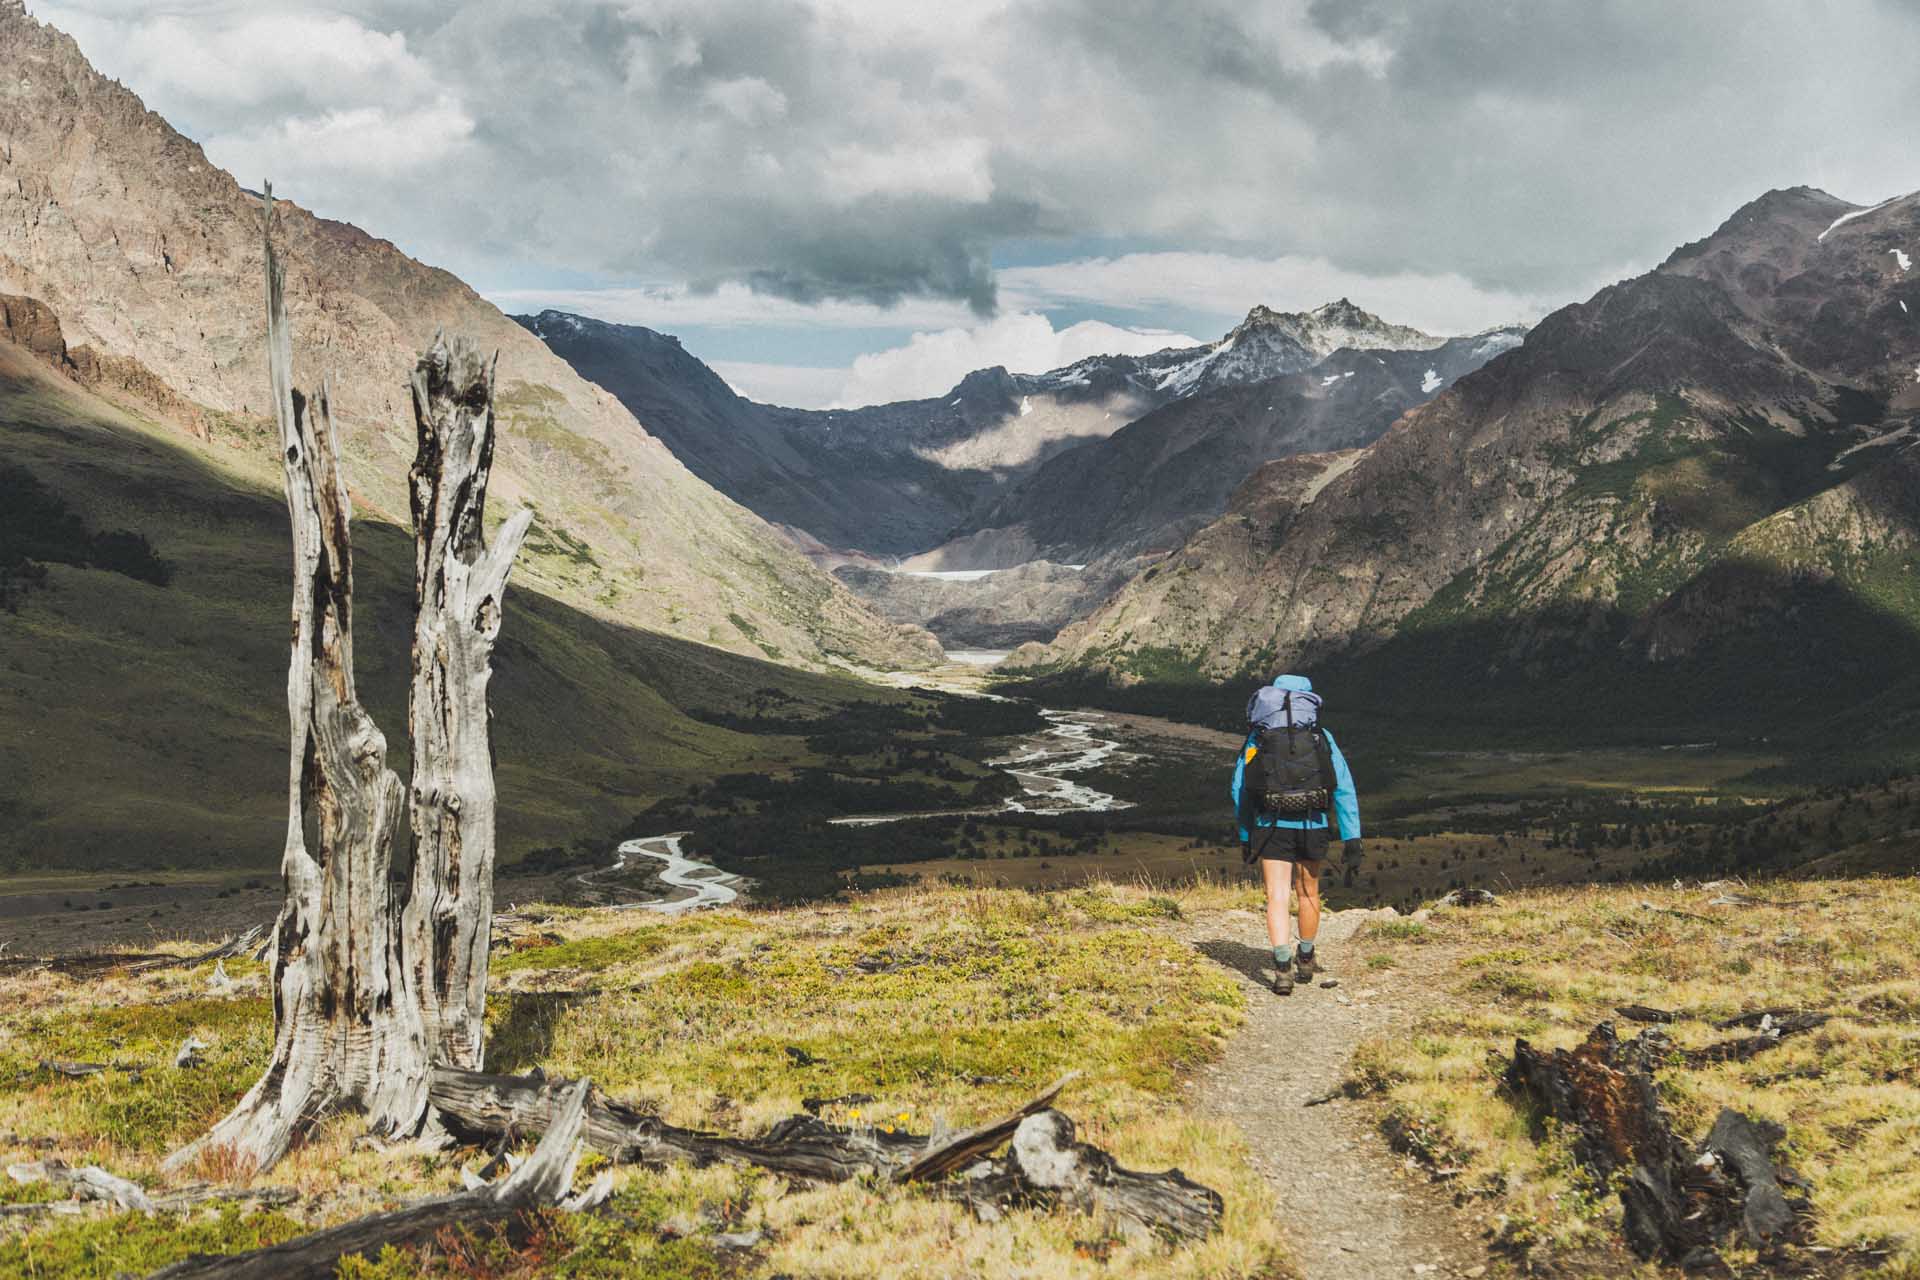
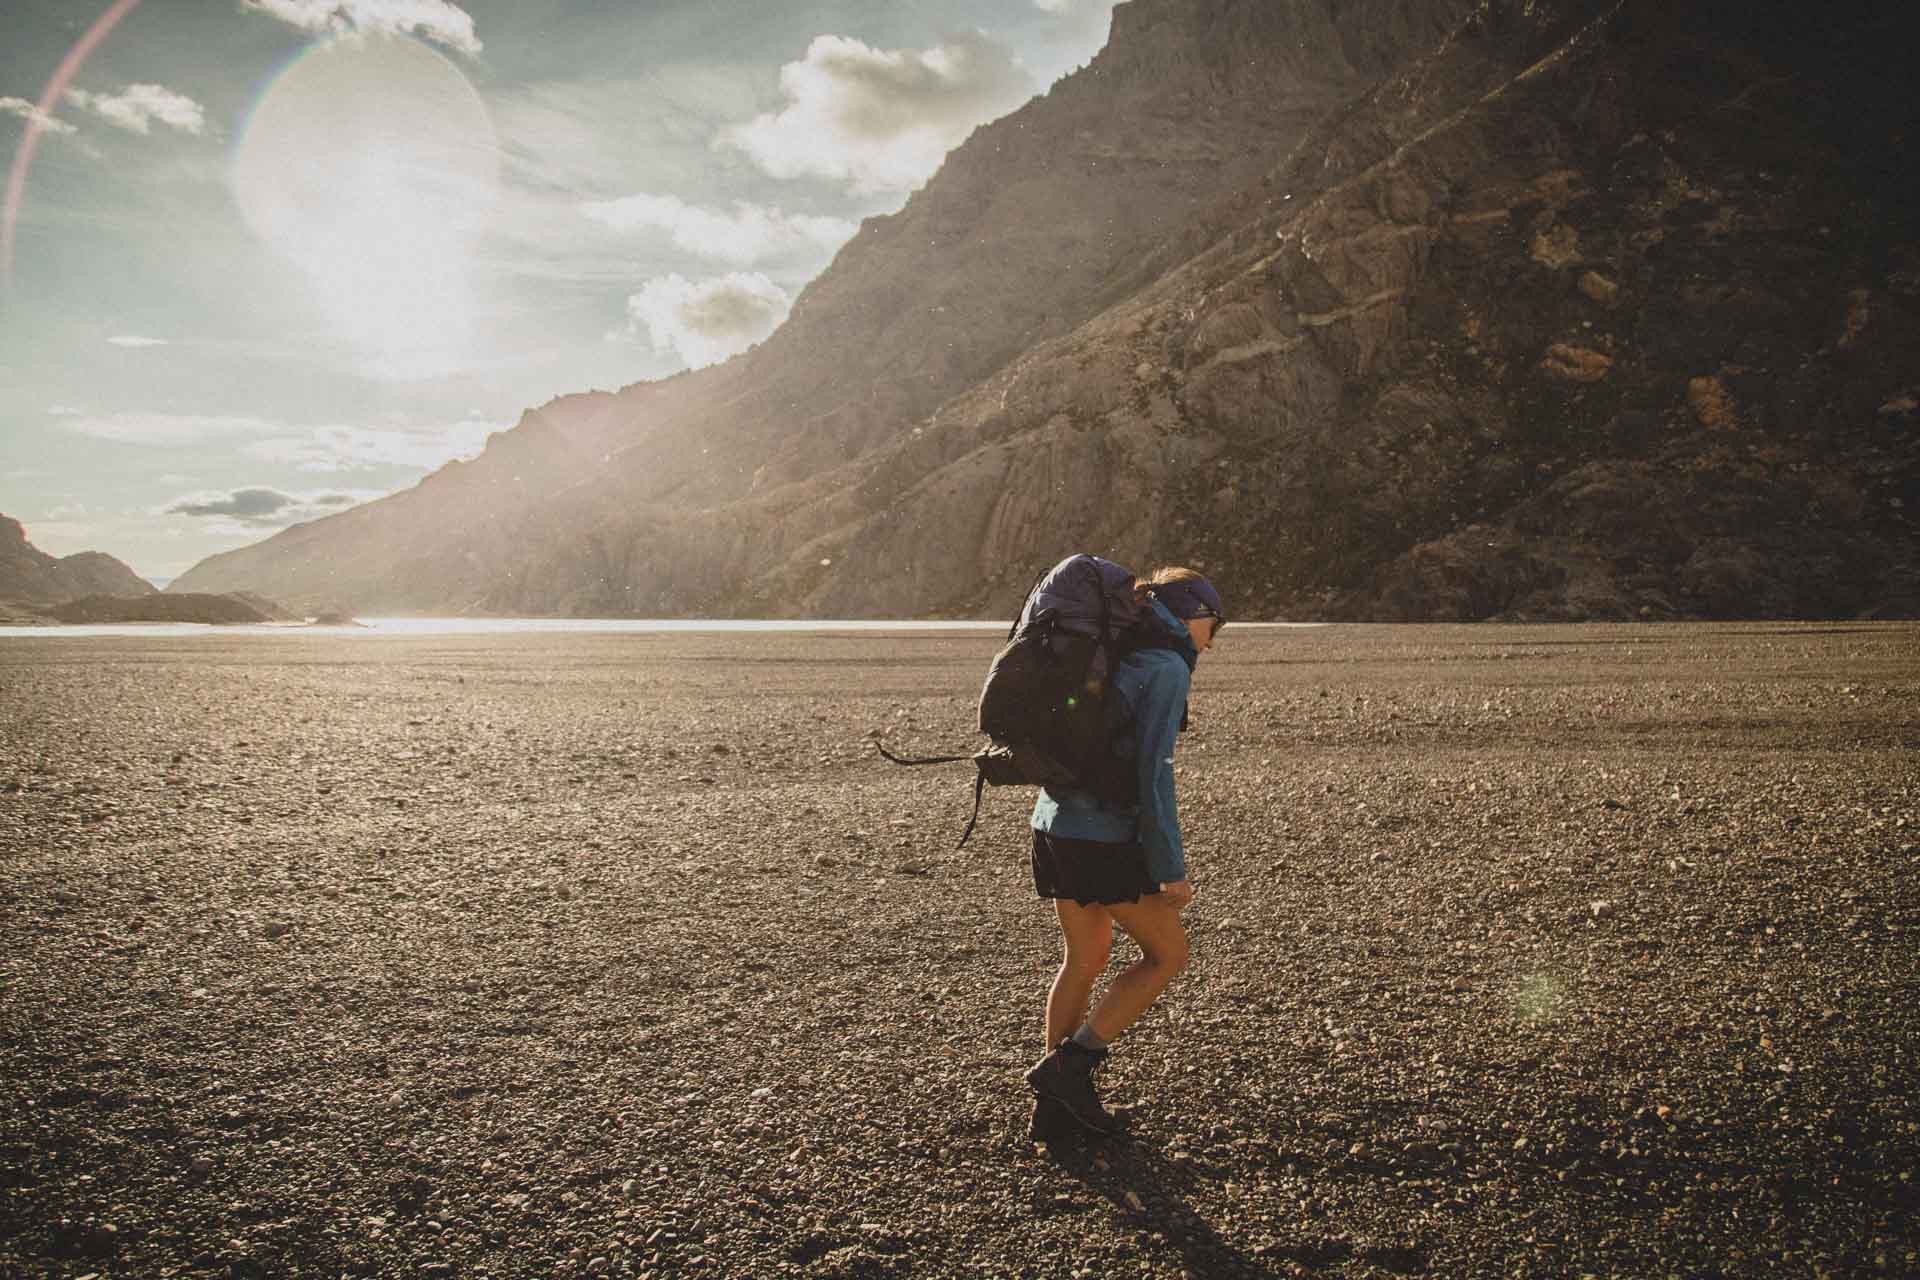
Day 1 – El Chaltén to Laguna Toro Campground (17,5km, 750m)
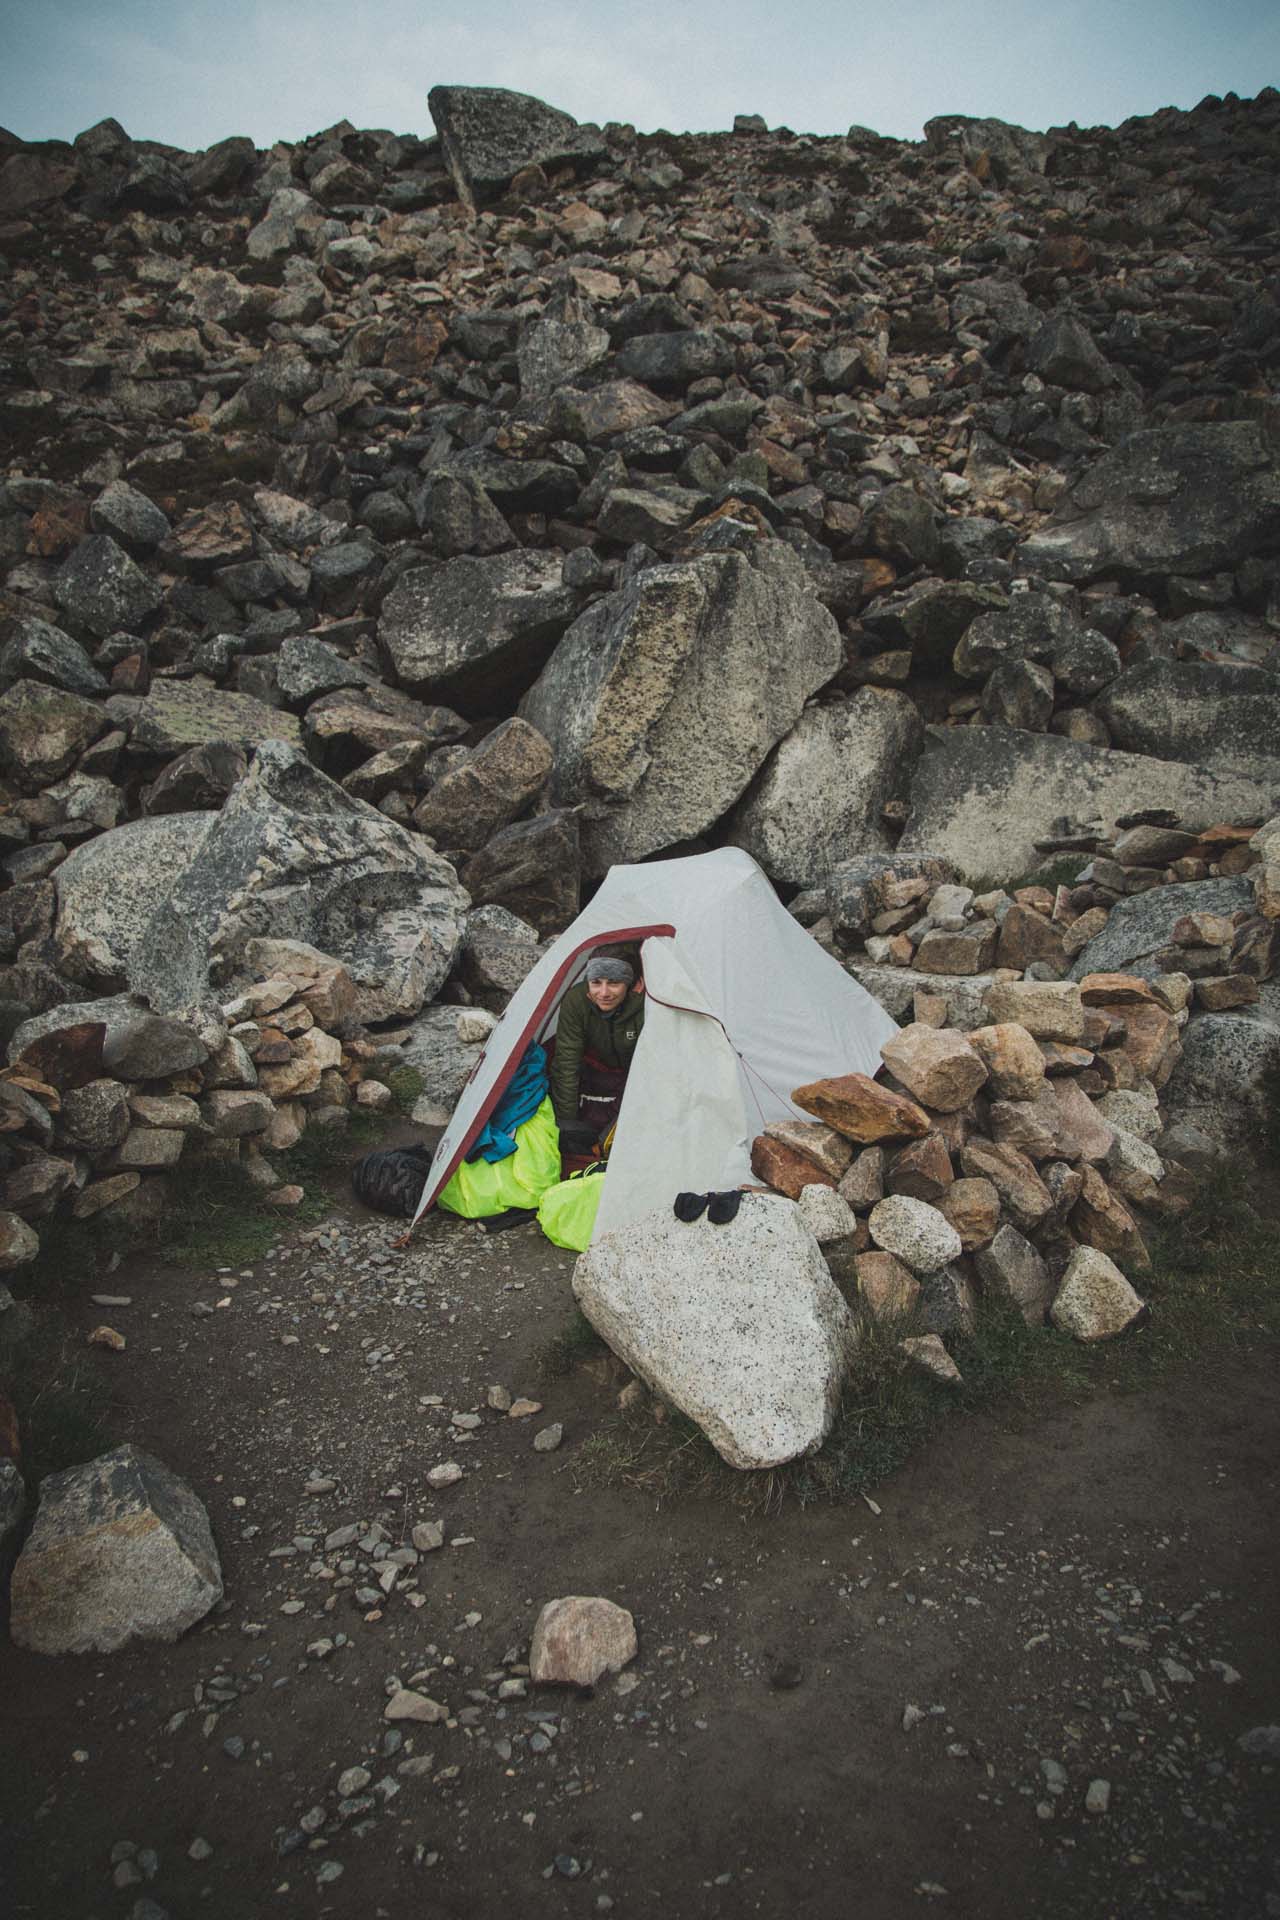
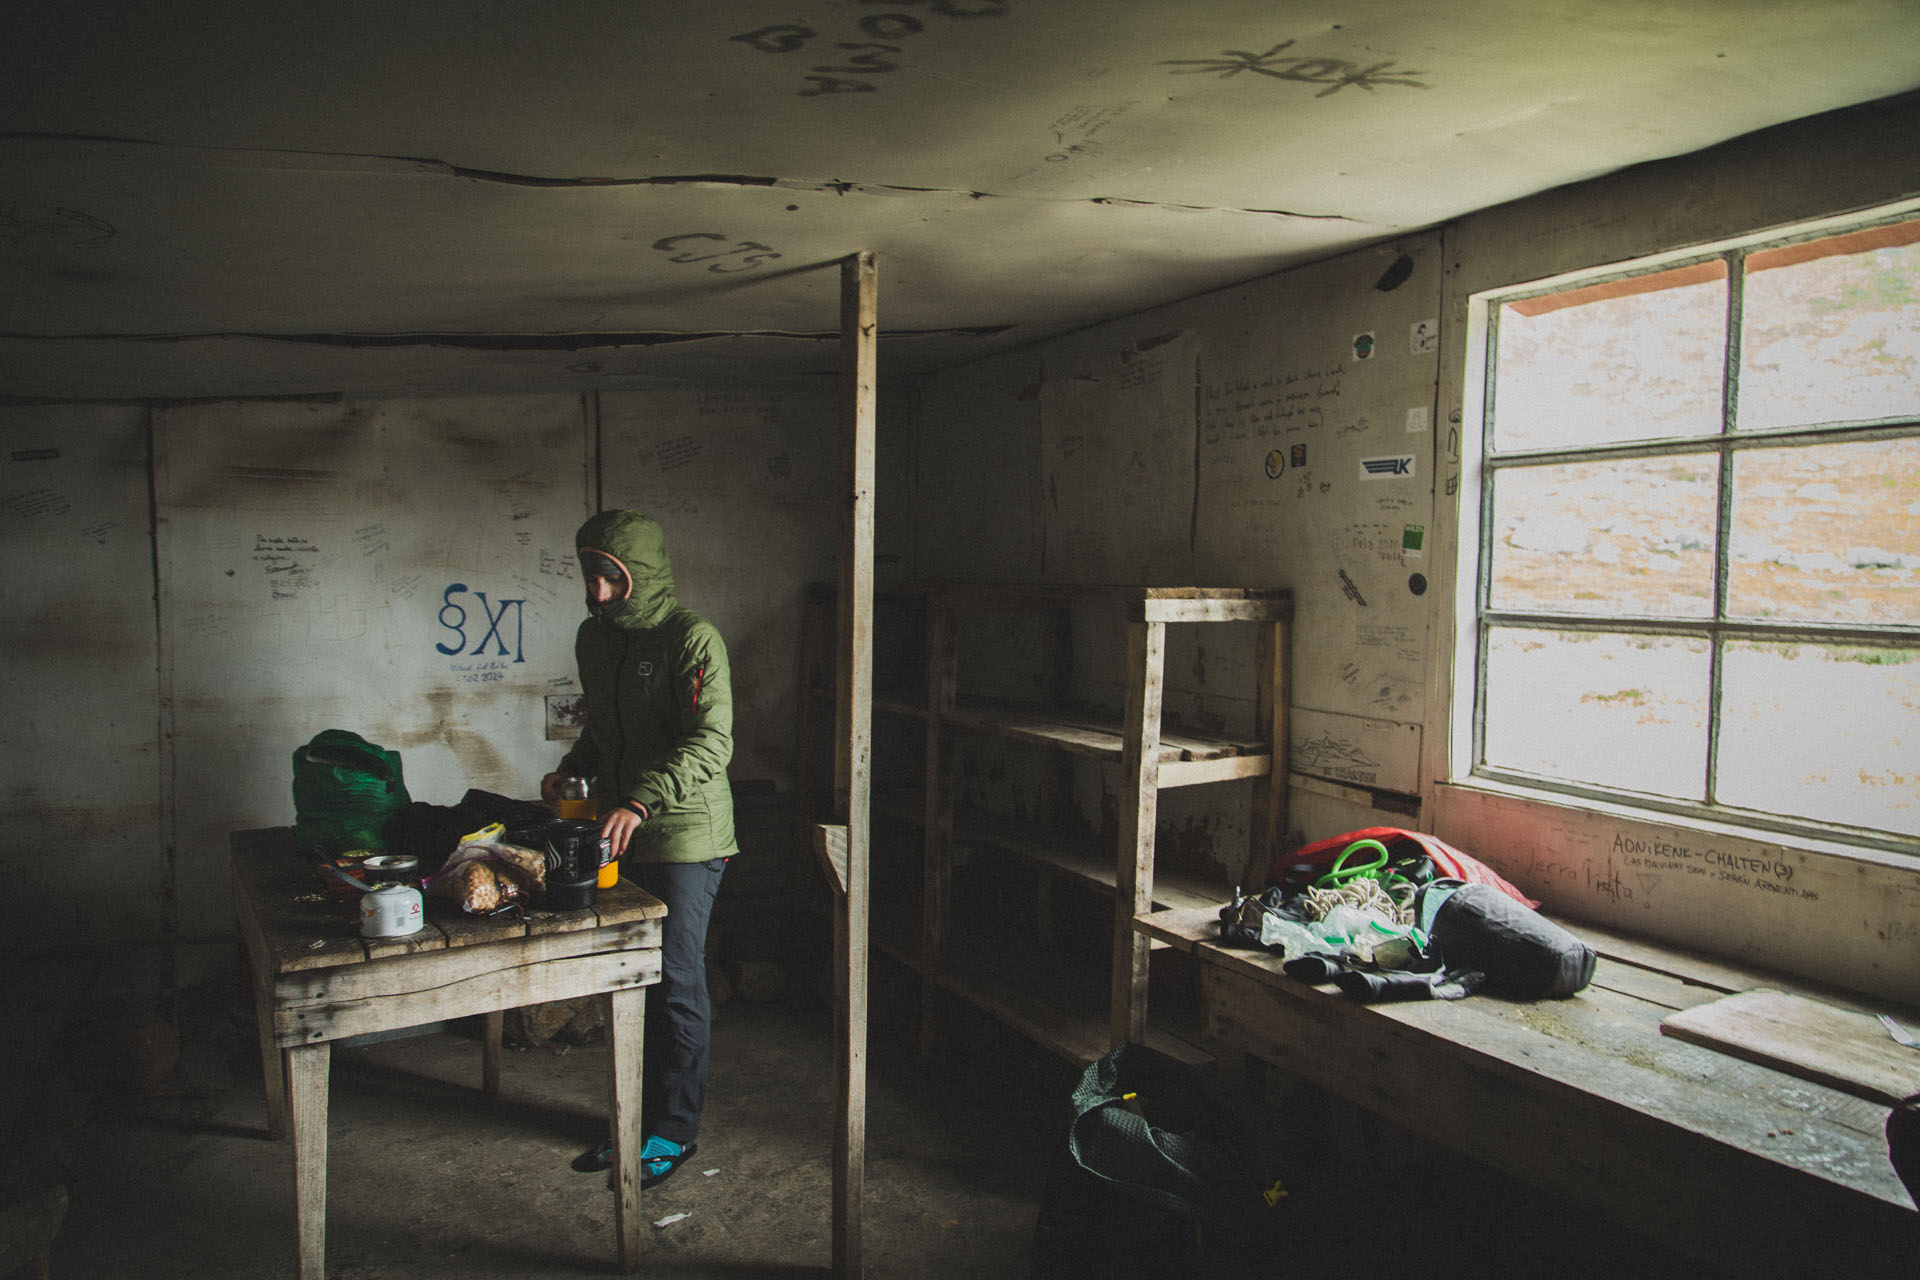
The day‘s work is basically one gentle drag uphill, topping out at 1050 meters. It’s followed by an equally easy descent down to Rio Tunél. The view of the valley is the first highlight of the trek. On a reasonably clear day we could just about spot Laguna Toro at the far end of the valley and the Glaciar Rio Tunél Inferior just behind it. The campground at Laguna Toro is nothing to write home about, but it provides the much needed shelter from the fierce winds coming down from Paso del Viento.
Day 2 – Laguna Toro to Paso del Viento Campground (14km, 900m)
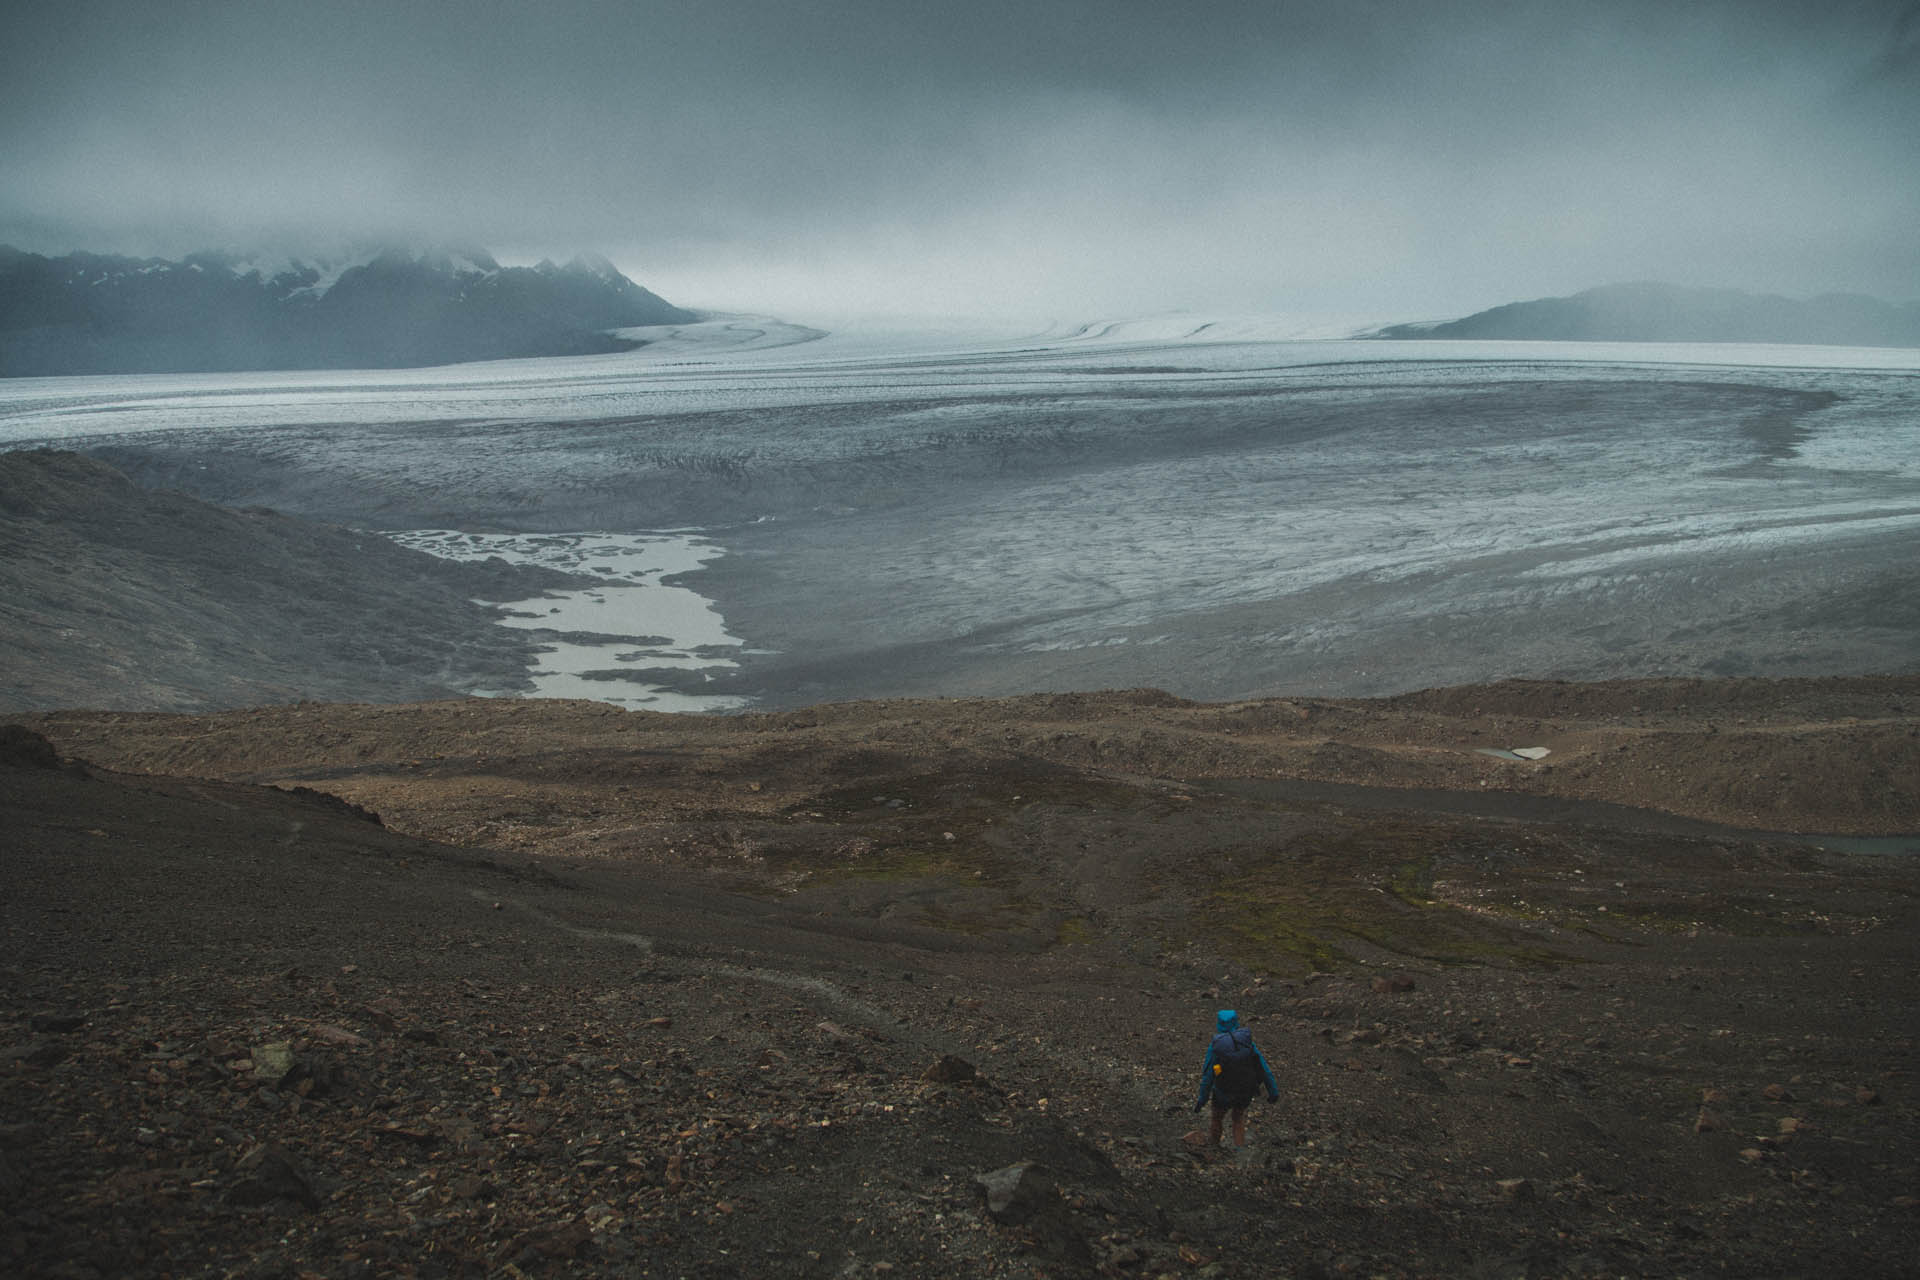
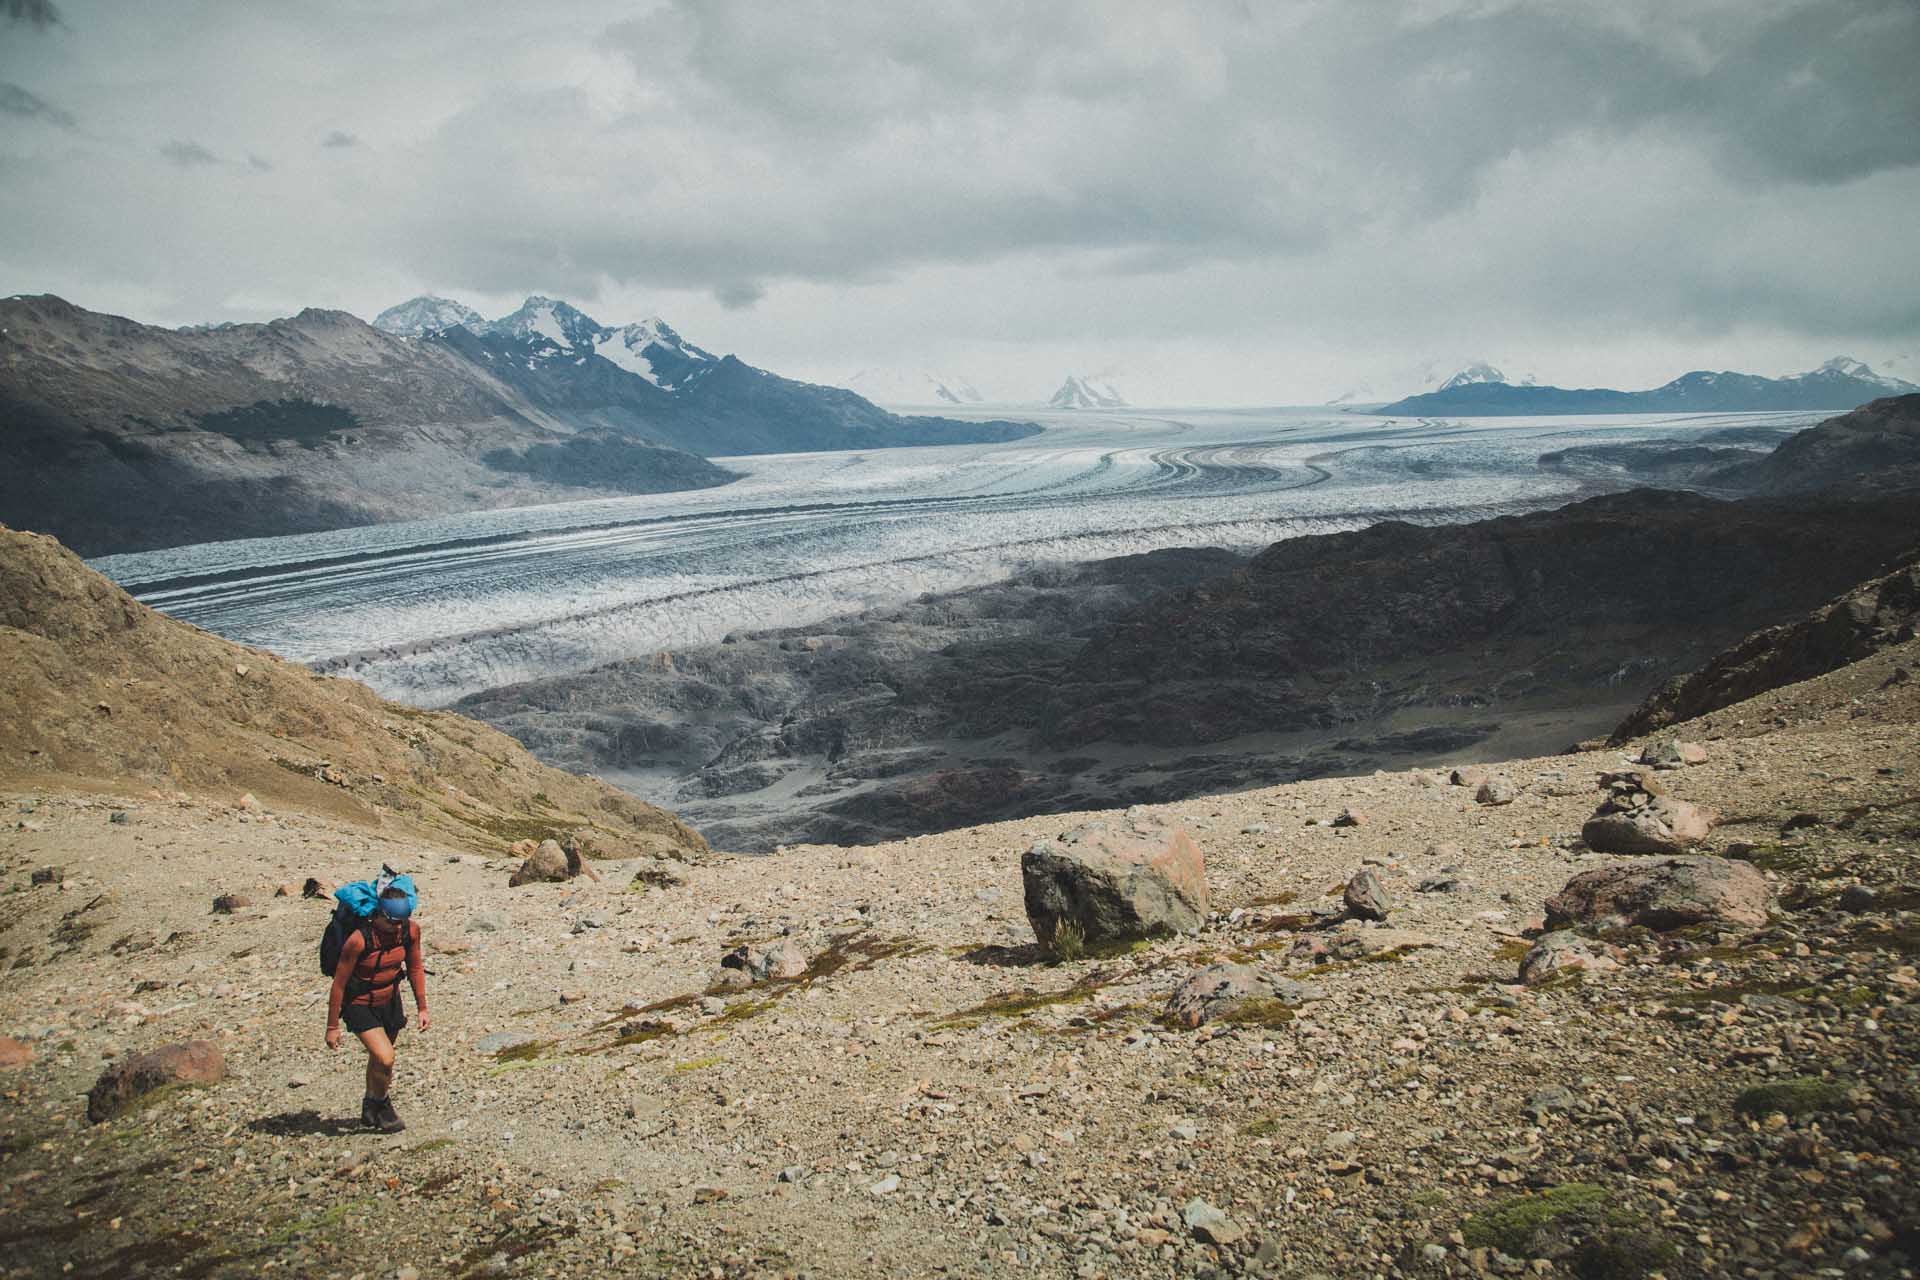
We‘d say day 2 is arguably the trickiest. Just after leaving the campground, the trail rounds a corner and that‘s where we were met with the full force of what windy Patagonia had to offer. Leaning into the gusts we passed Laguna Toro and proceeded to the tirolesa across Rio Tunél. While the whole affair was a bit daunting at first, it turned out to be a pretty straight forward and fun experience – once we were safe on the other side that is to say. Next up: Glaciar Rio Tunél Inferior. This a bit tricky to explain, but let me give it a shot:
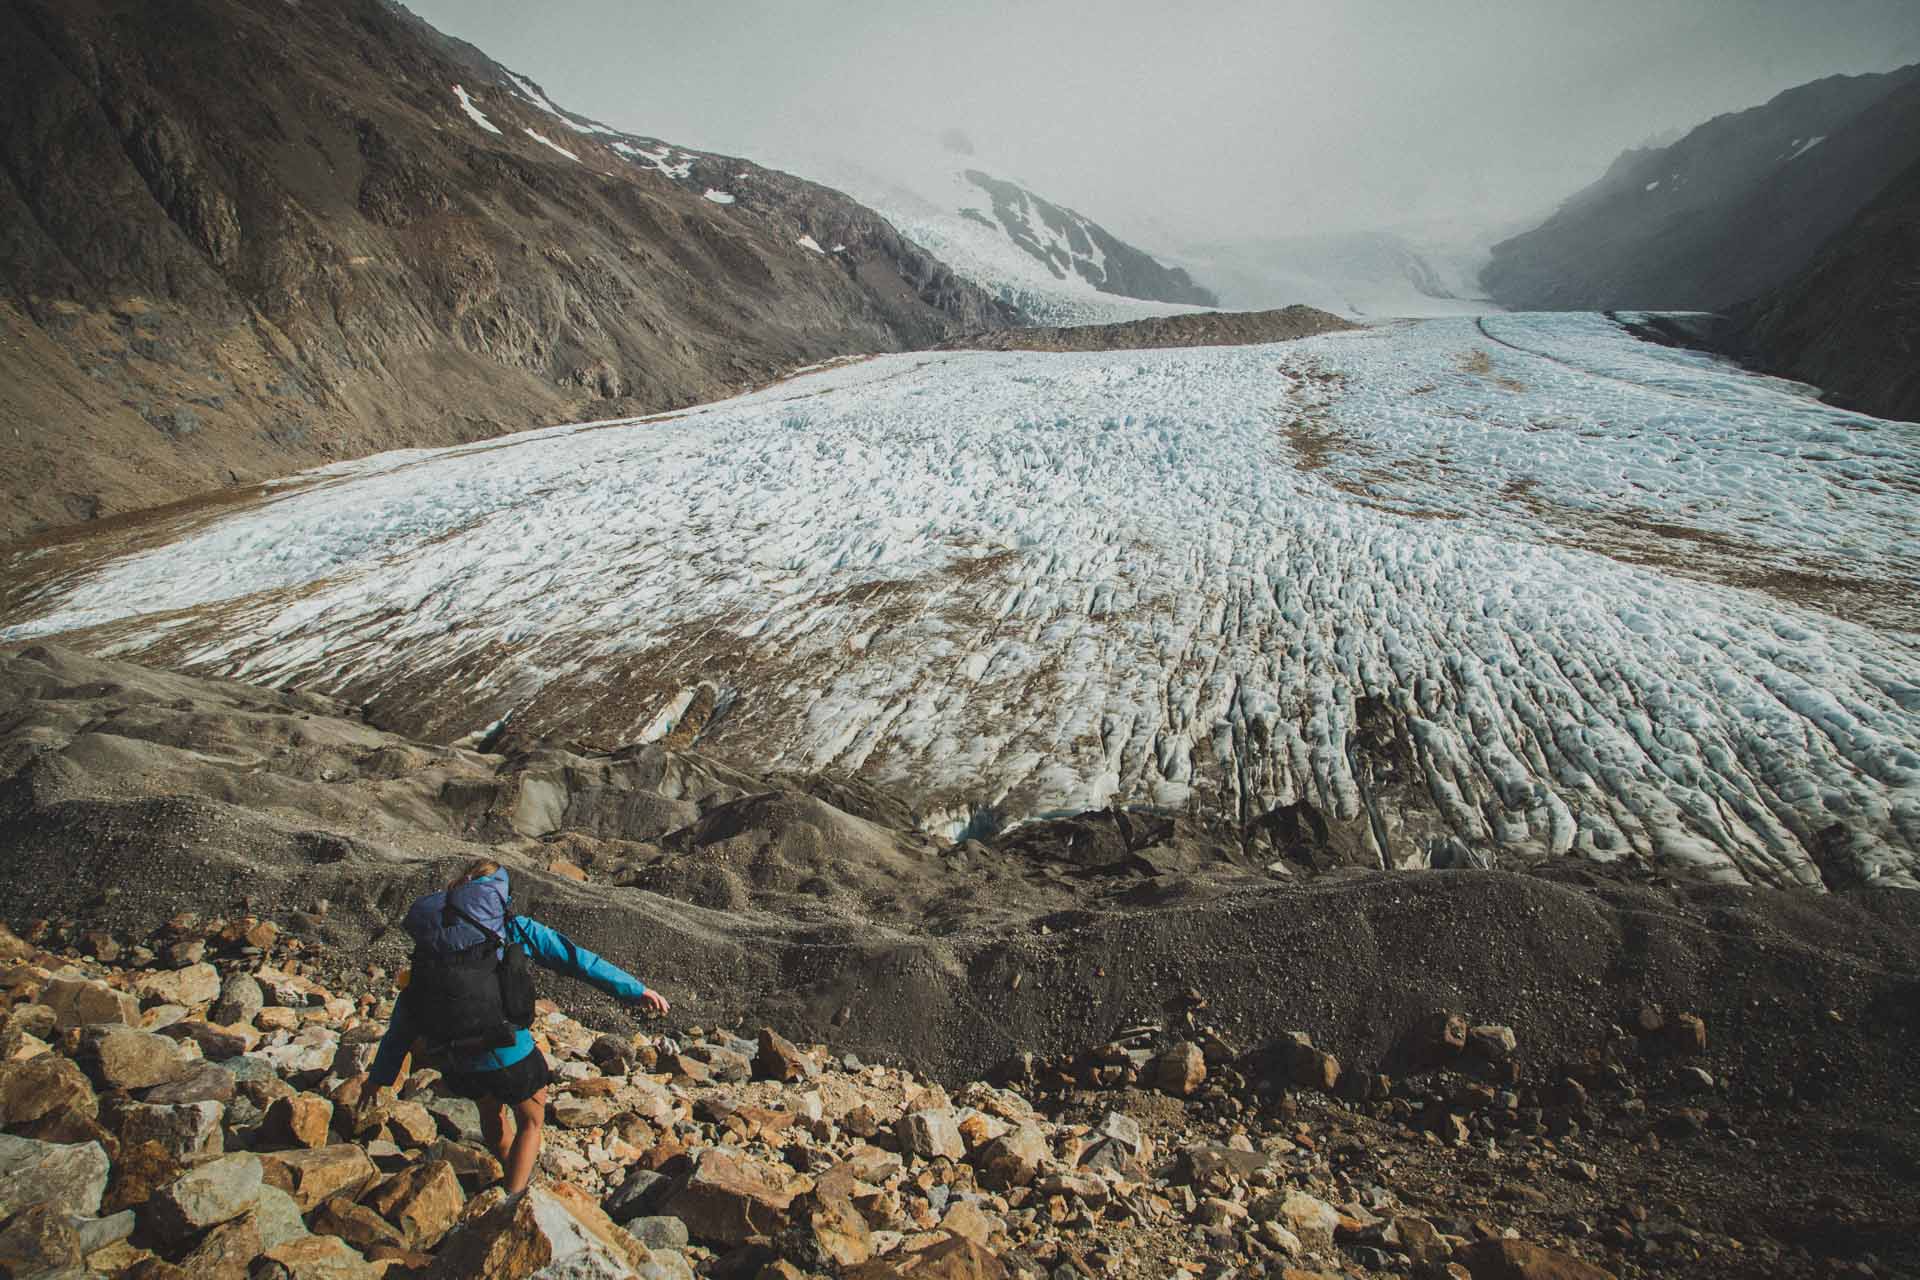
Looking along the trail, the glacier comes in from your right and it‘s met head on by a steep morane to your left. Between the naked ice of the glacier and the rocky morane, there is sort of a rubble ridge that is slightly elevated from the glacier. The top of that ridge seemed to us like the safest way along the glacier. Unfortunately there was a small section where the ridge was interrupted. Here we had to choose between scrambling up the morane or go down to the glacier, in order to navigate around the interruption. We chose scrambling.
Looking back, this was probably the more dangerous choice. Those huge, loose rocks on top of the morane are just sitting there waiting to come crashing down on unsuspecting hikers. On the other hand, walking on a glacier without the proper gear did not seem like the best idea either. The official recommendation however seems to be walking on the glacier. Anyways, all went well, so on to the next challenge we went.
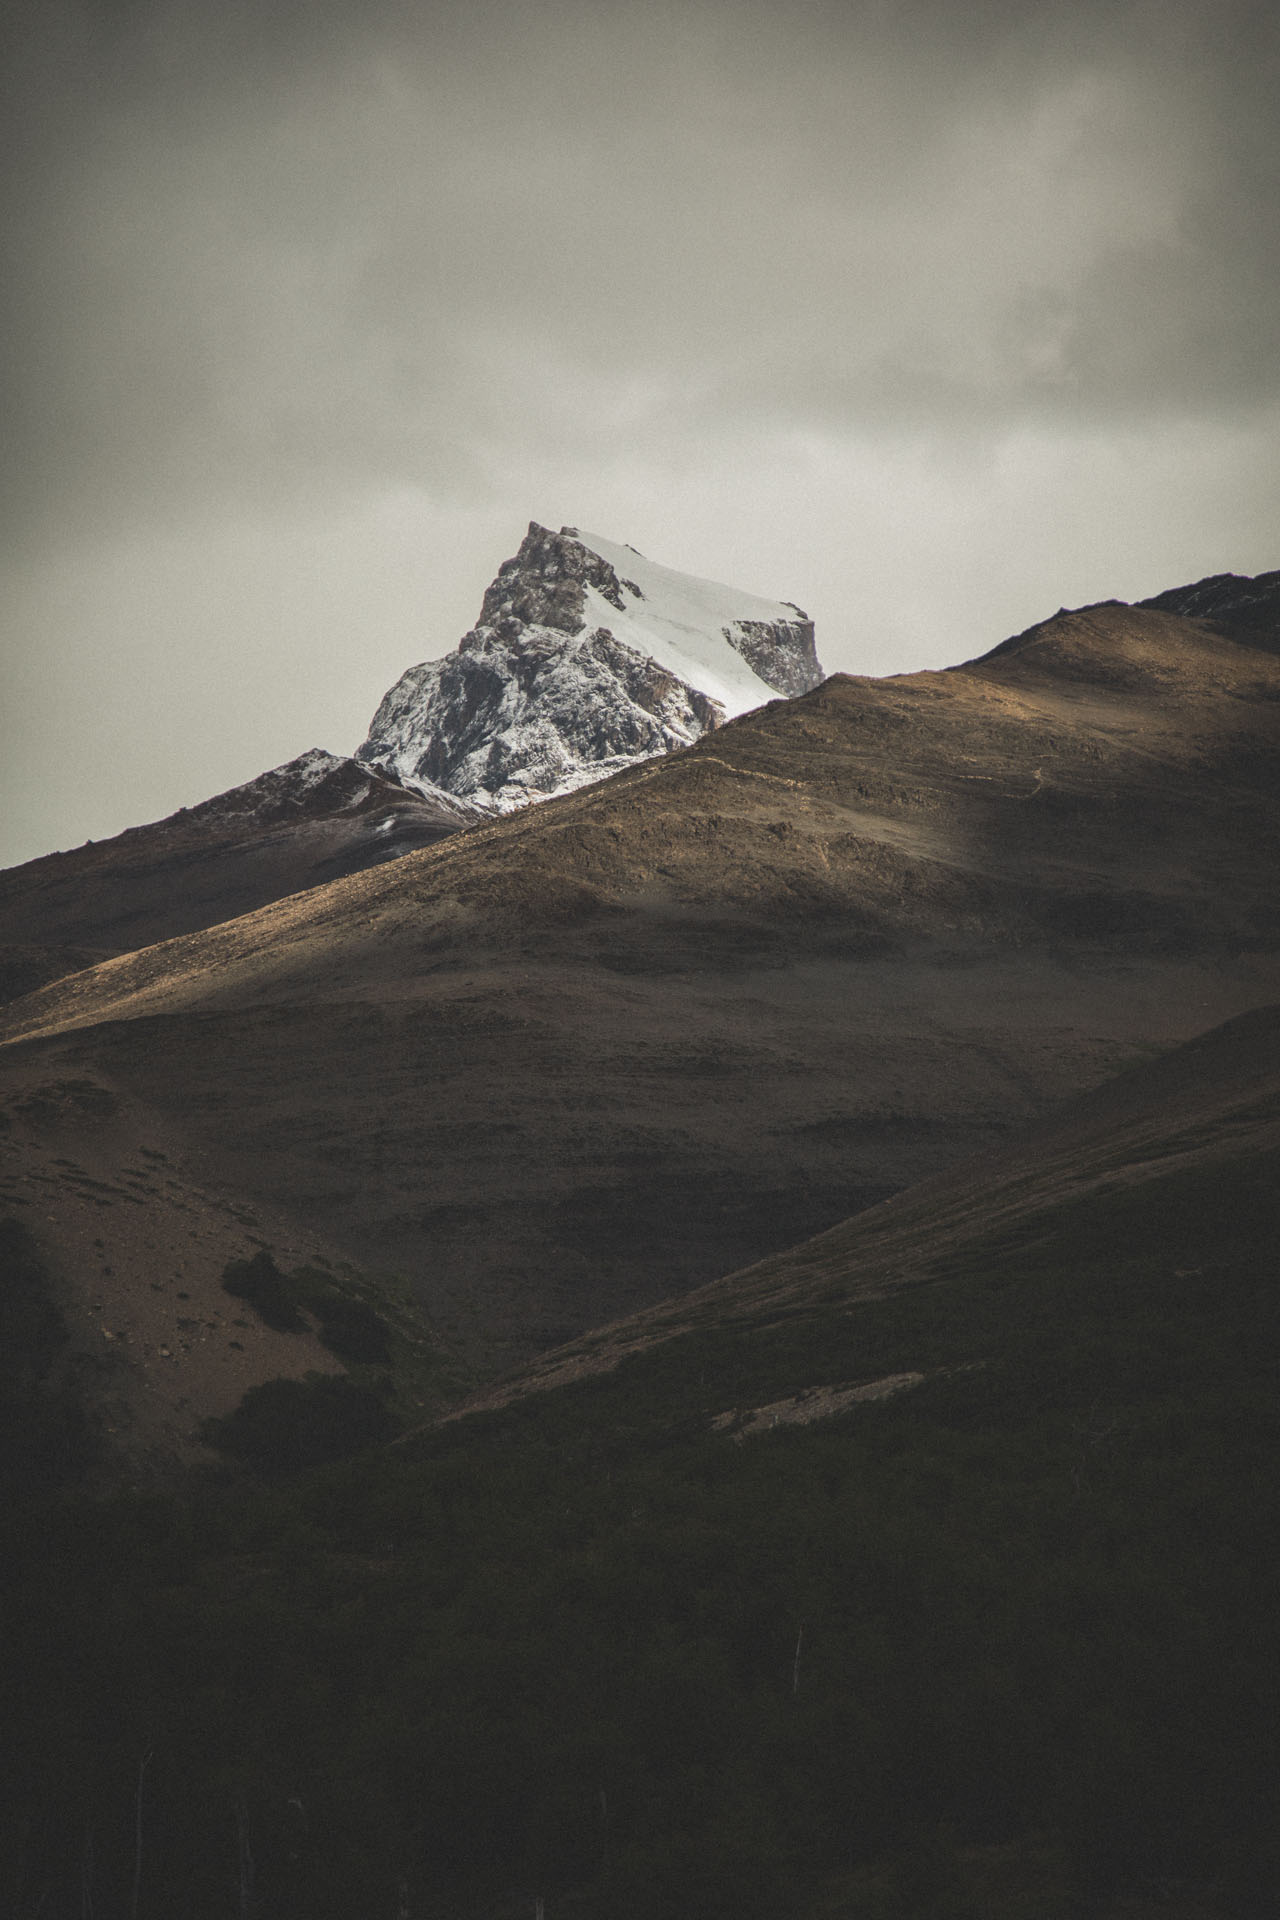
The Paso del Viento is only to be crossed, if the winds aren’t strong.
In our case there was wind, but not enough to turn us back. Also the ascent is not very exposed so it would take some very strong gusts to blow you off the mountain. But use your best judgement.
The view from the top of Paso del Viento down onto the Hielo Patagonico Sur is something else. It is similar to what you get on top of John Gardner Pass looking down on the Grey glacier; just more massive. The vastness of that never ending ice field is quite hard to capture with either words or photos. So I‘m afraid you have to go see it for yourself.
The downhill from Paso del Viento is not particularly steep or exposed. Which is good because here the wind was again of the lean-into-it kind. We basically ran down the pass in pouring rain and a heavy tailwind and wound up at Paso del Viento campground in no time. And thus was completed the third and last challenge of the day. The one positive result of the bad weather conditions was a completely empty campground. In general we only met two other people all day and they were doing the trek the other direction.
Day 3 – Paso del Viento Campground to Los Tempanos (25,8km, 830m)
It’s a pretty straight forward day with the downhill of the Paso Huemul being the defining feature. We meandered along the Viedma glacier on a sunny day wondering what the Paso Huemul descent was all about. And to be honest, in dry conditions it‘s not that big of a deal. Also you are aided by fixed ropes at the steeper parts. Granted, on a windy and rainy day, I could see this part becoming an actual challenge.
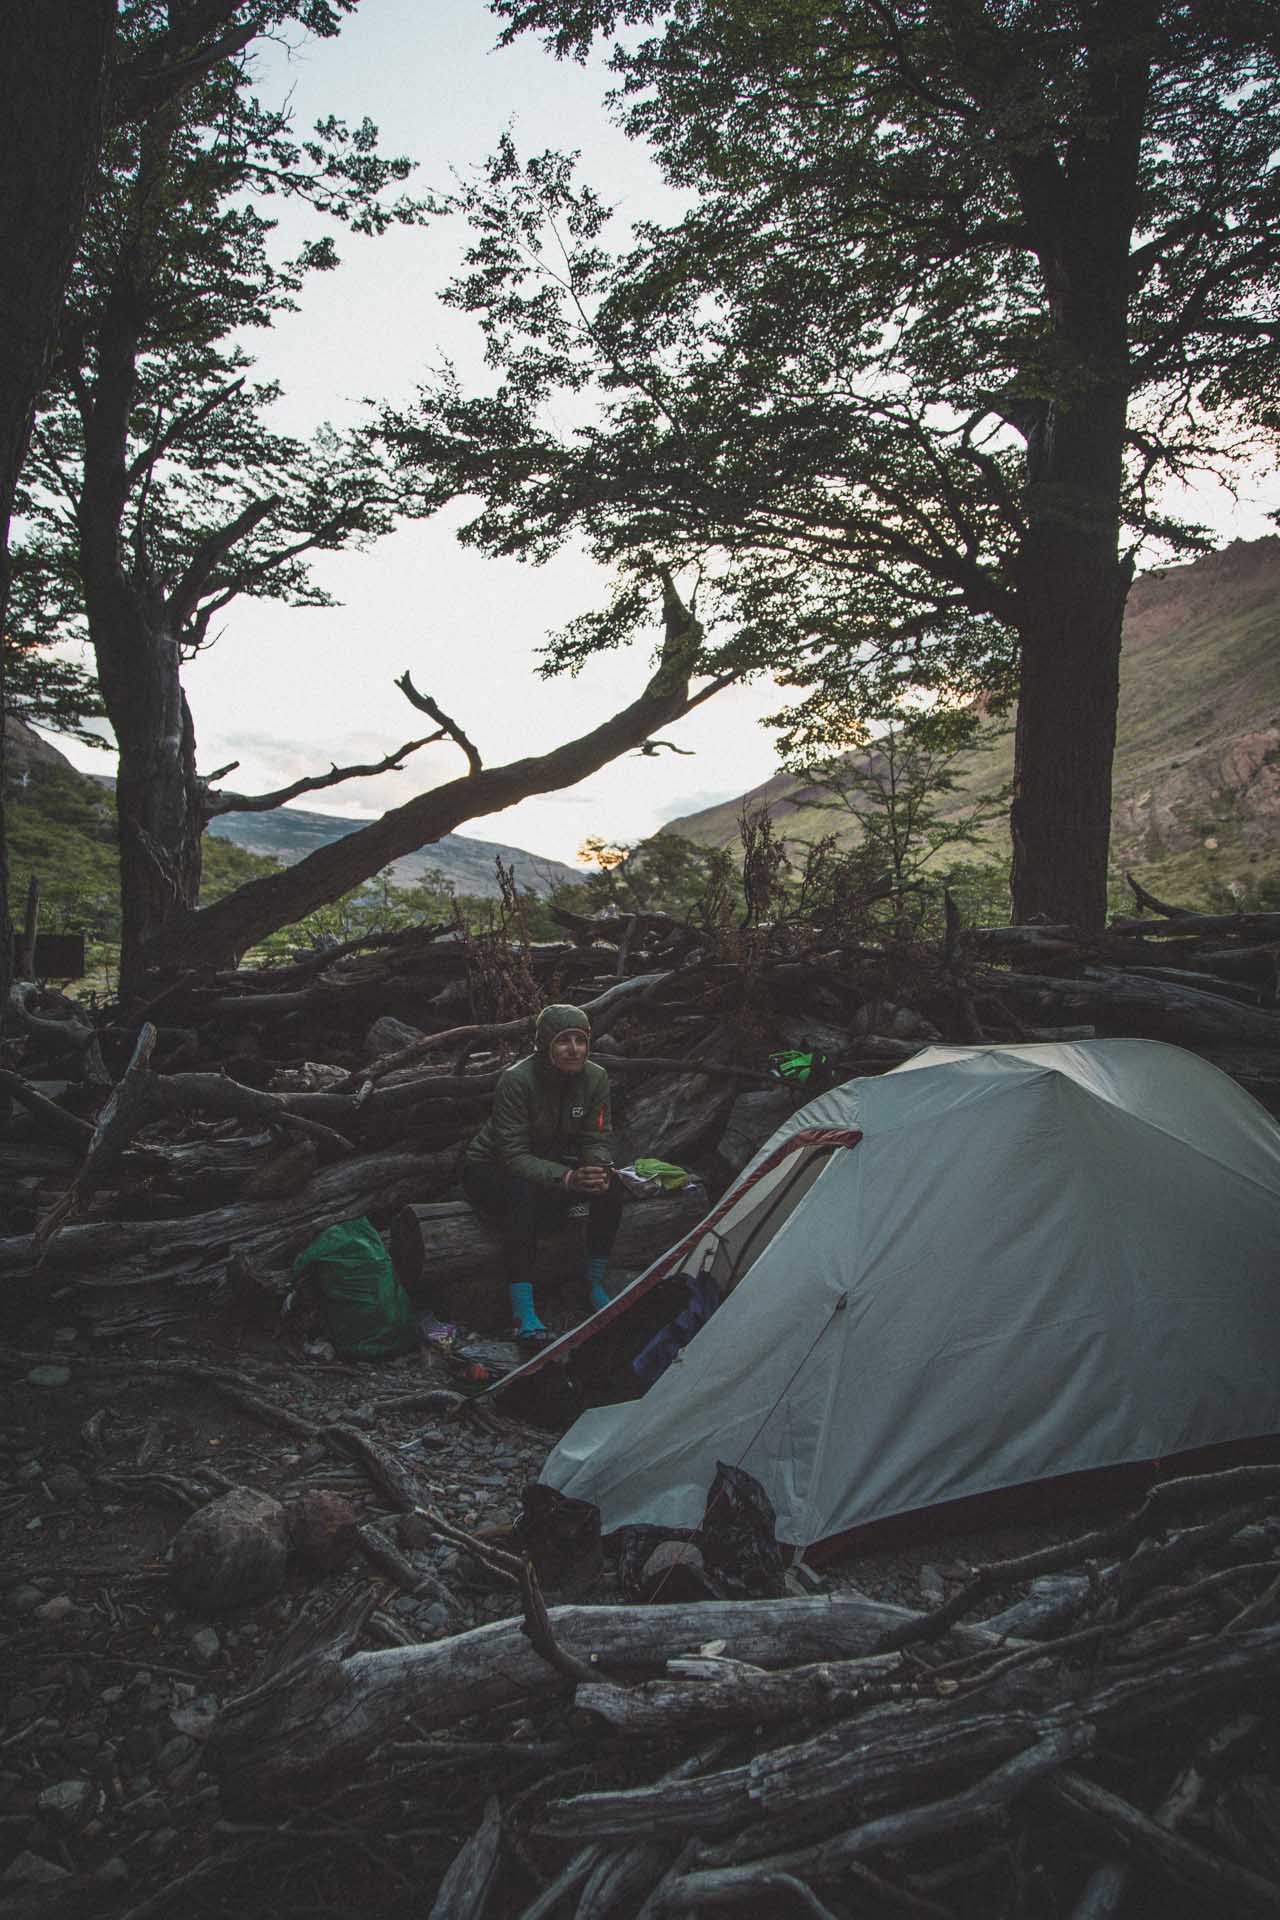
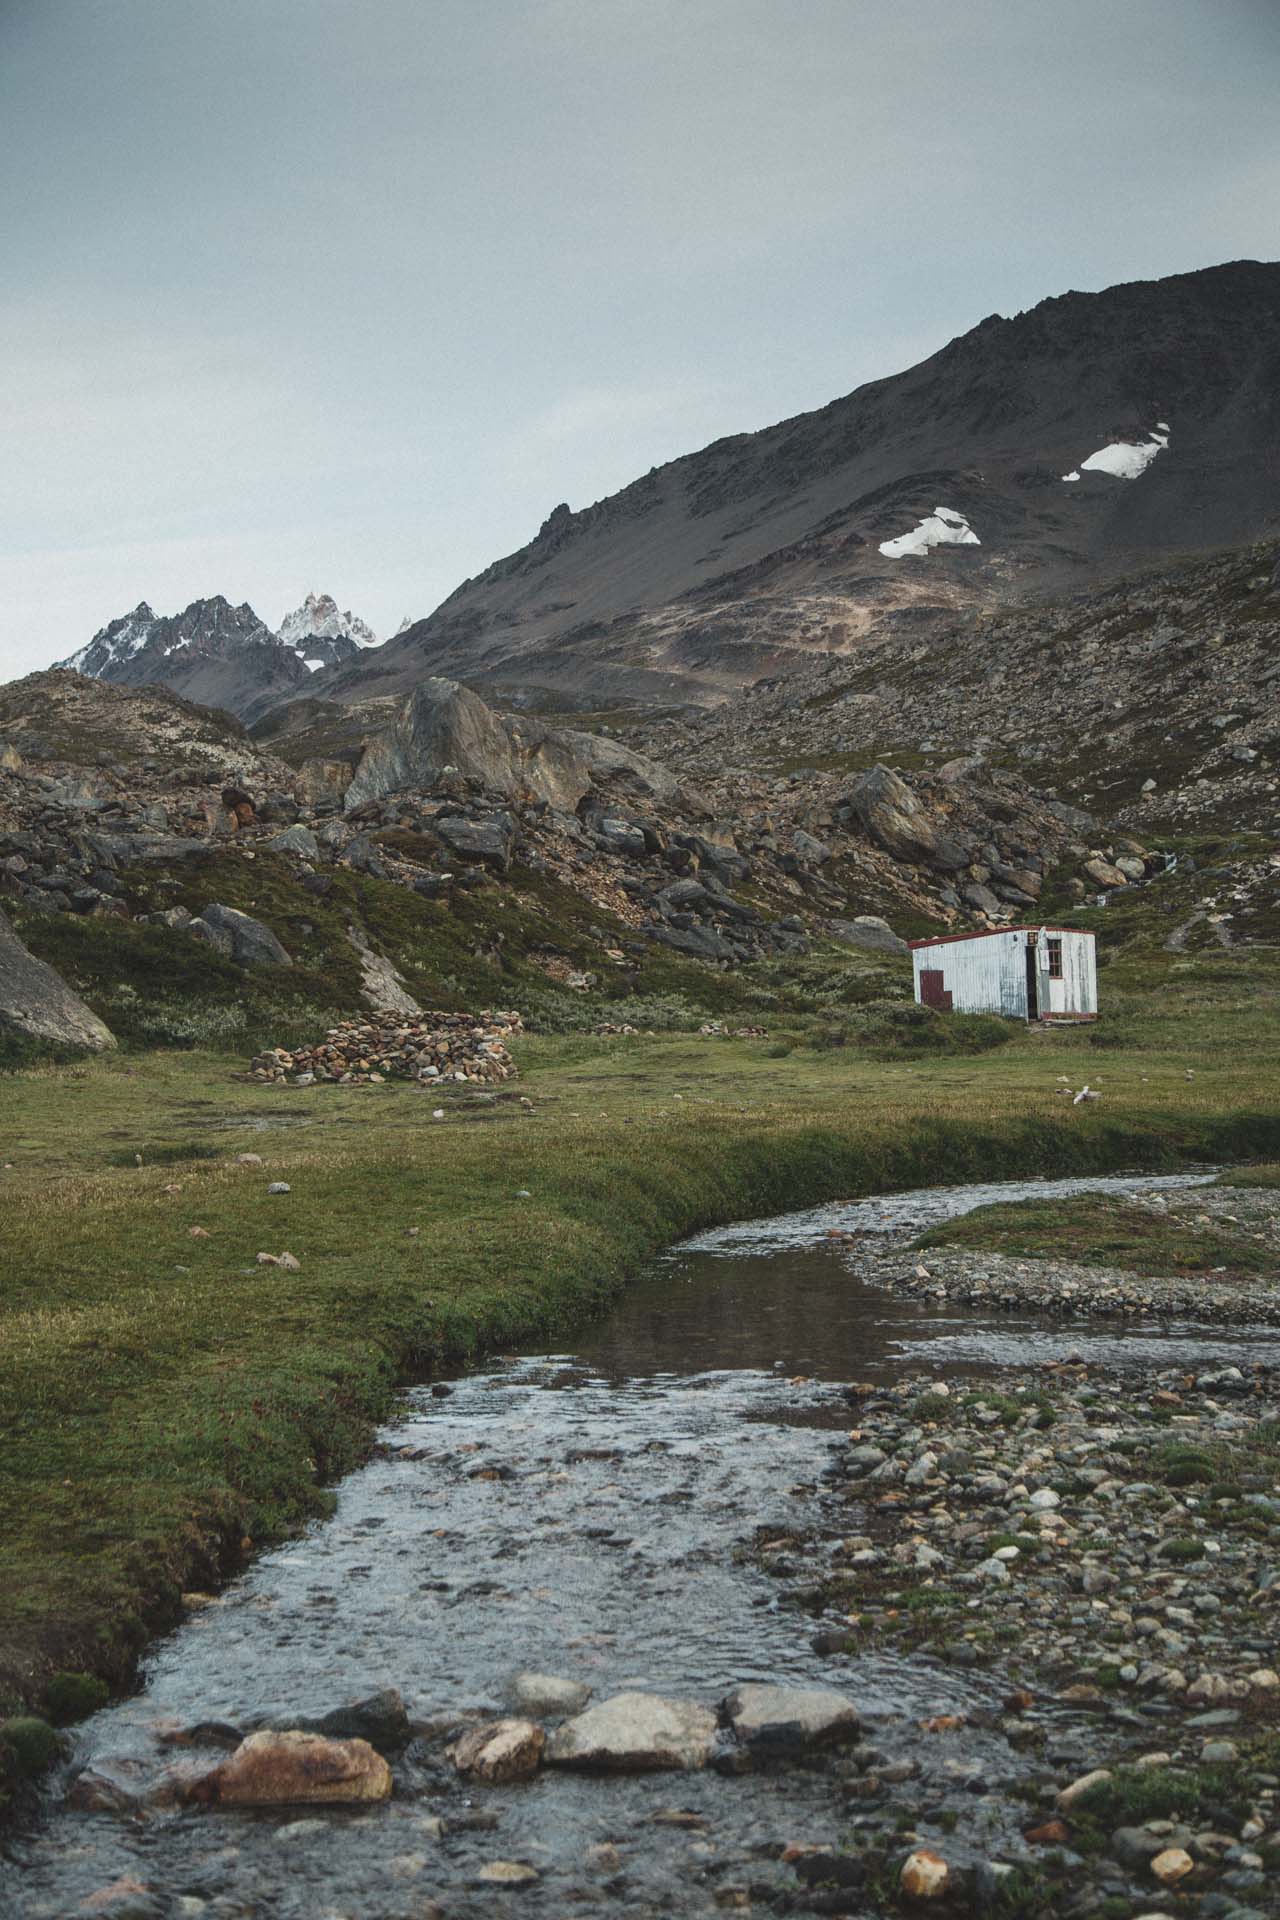
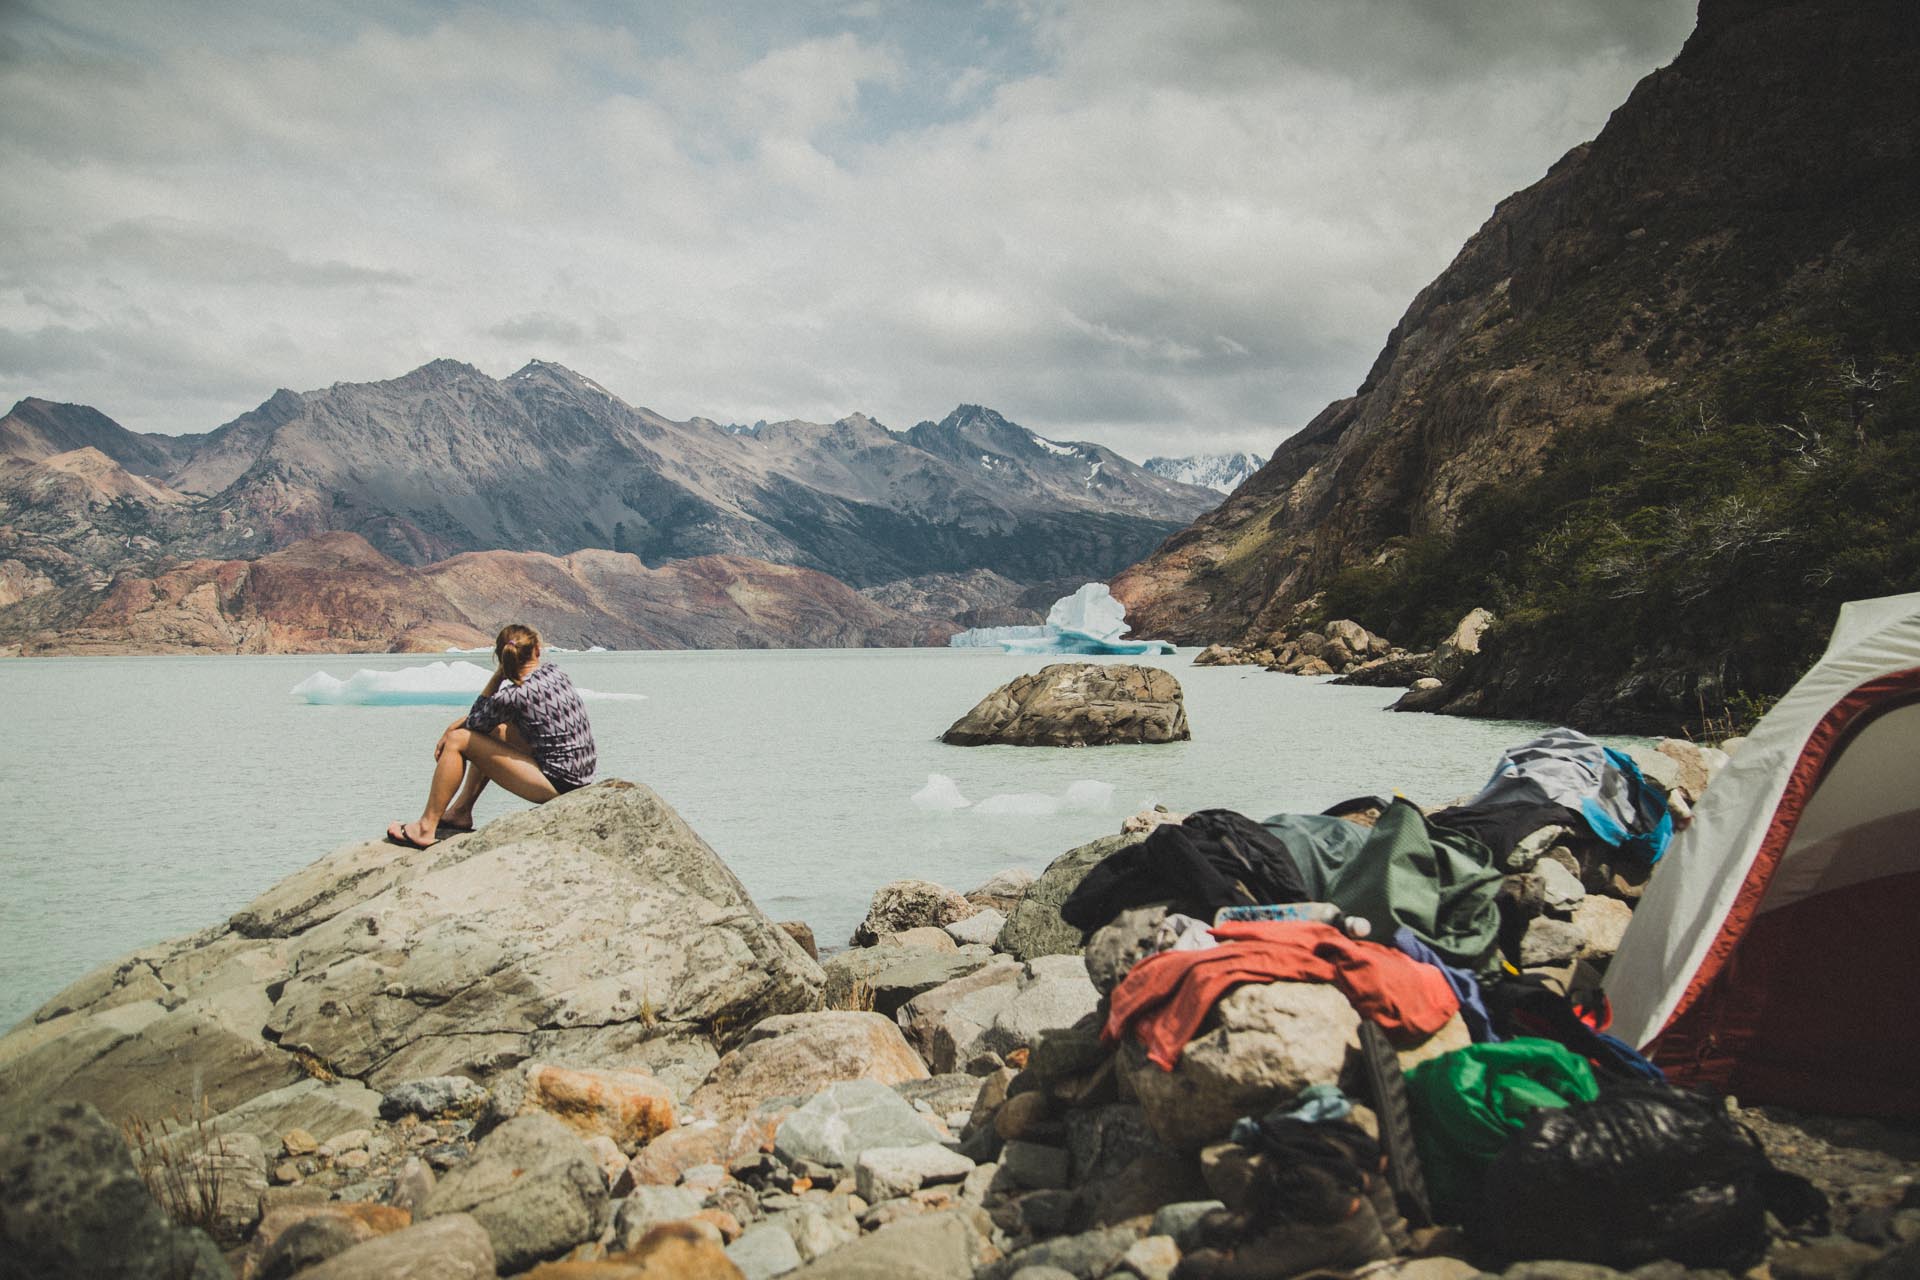
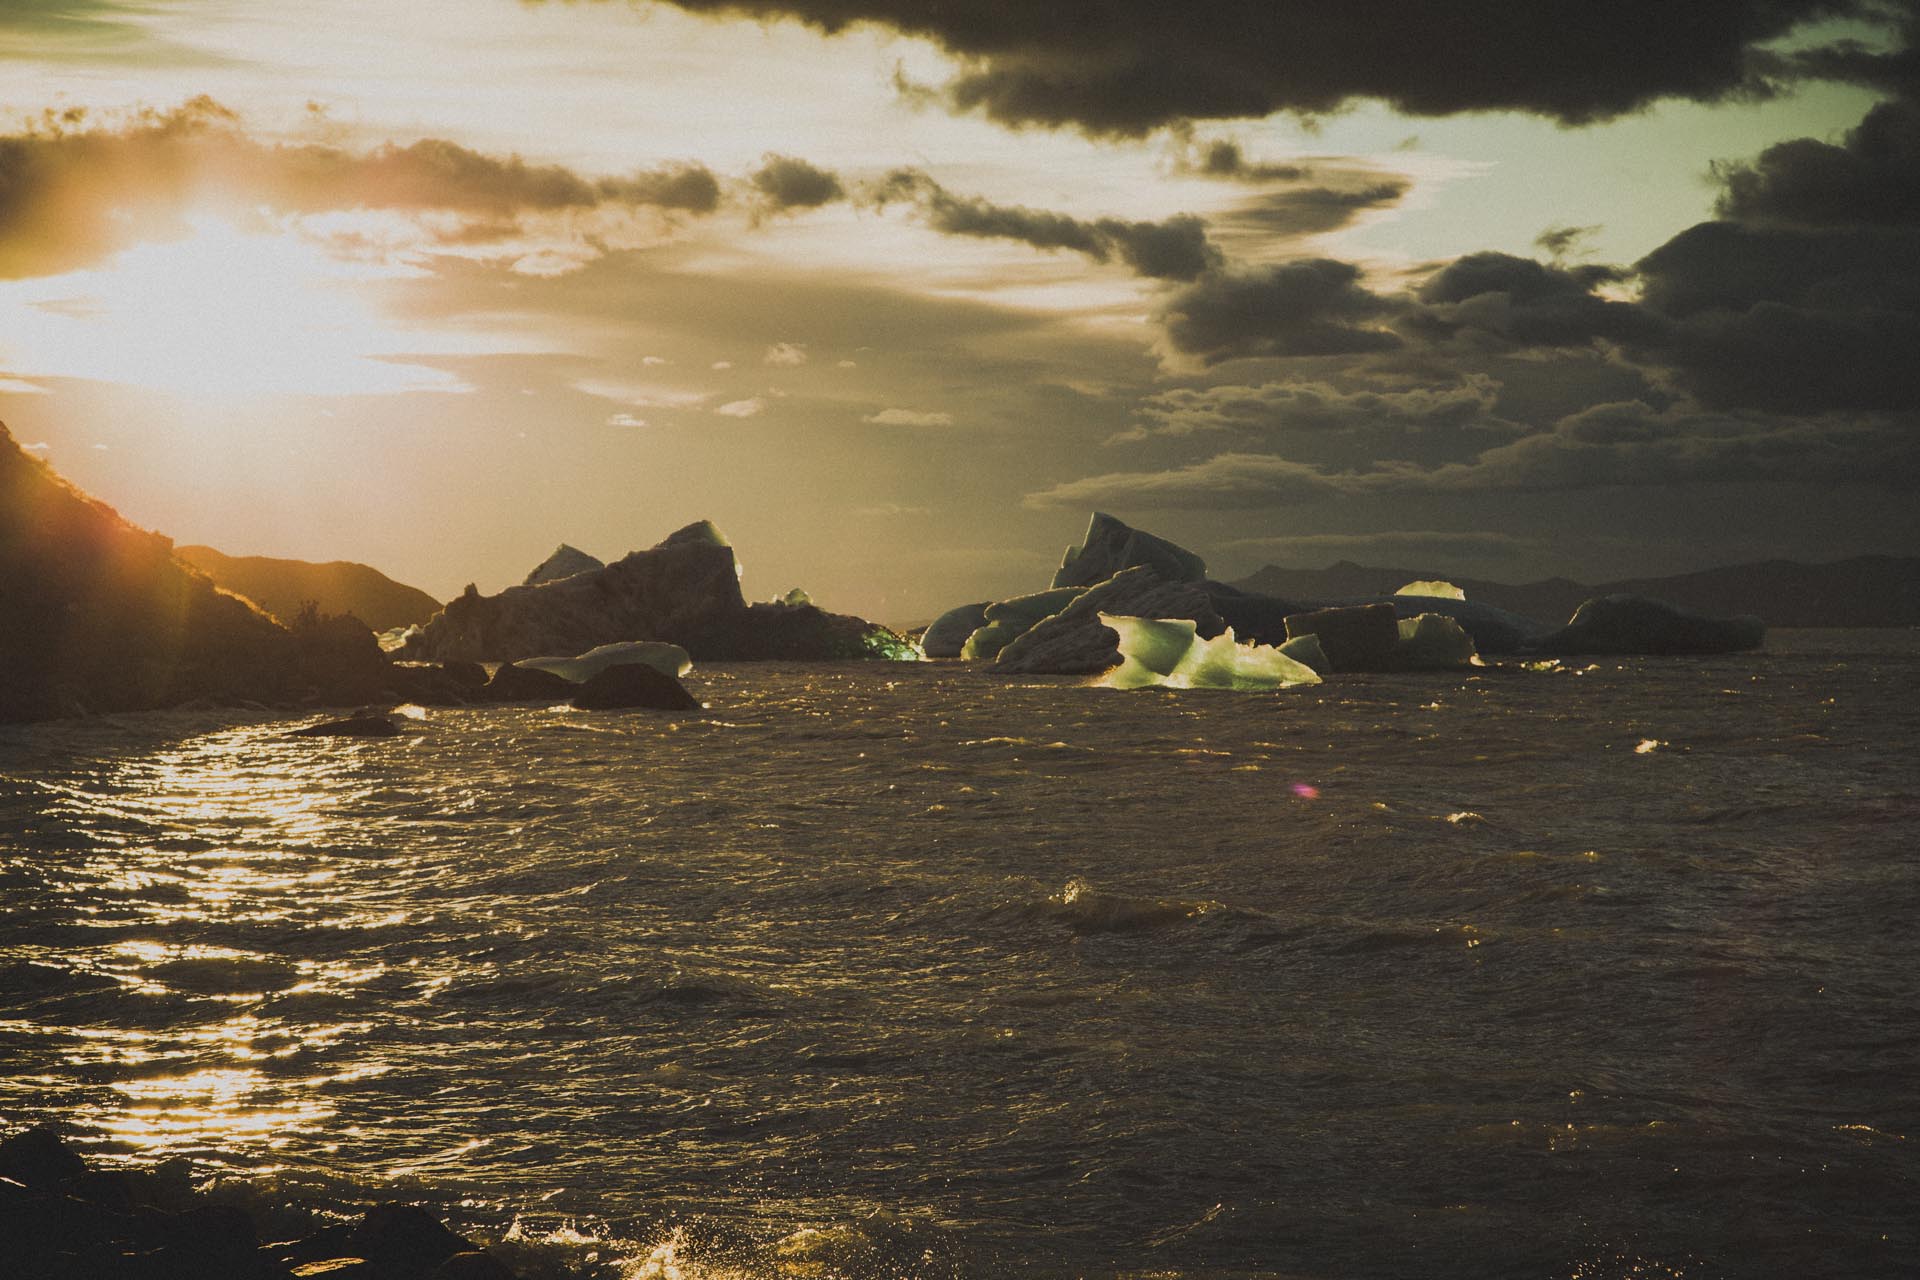
The campground at Los Tempanos, which is just a stone’s throw from the end of the downhill, is another Huemul Circuit highlight. There are several camping spots in the forest and four spots or so on the beach of Lago Viedma. And it‘s the icebergs floating right outside your tent door that make all the difference. Good stuff!
In our case the campground was almost empty and we were the only ones pitching a tent at the beach.
Day 4 – Los Tempanos back to El Chaltén (25km, 830m)
The day starts reasonably good with a hilly stroll along the edge of Lago Viedma that takes you to the second tirolesa. In our case this tirolesa posed a special challenge. Usually, in order to fetch the pulley, there should be thin ropes attached to it. But there were no ropes to be seen. On neither side. So I had to hook up straight to the steel cable, shimmy to the middle of it, grab the pulley, shimmy back and then do it the proper way. When renting Huemul gear they also give you a thin 30m rope. At this point it became clear why.
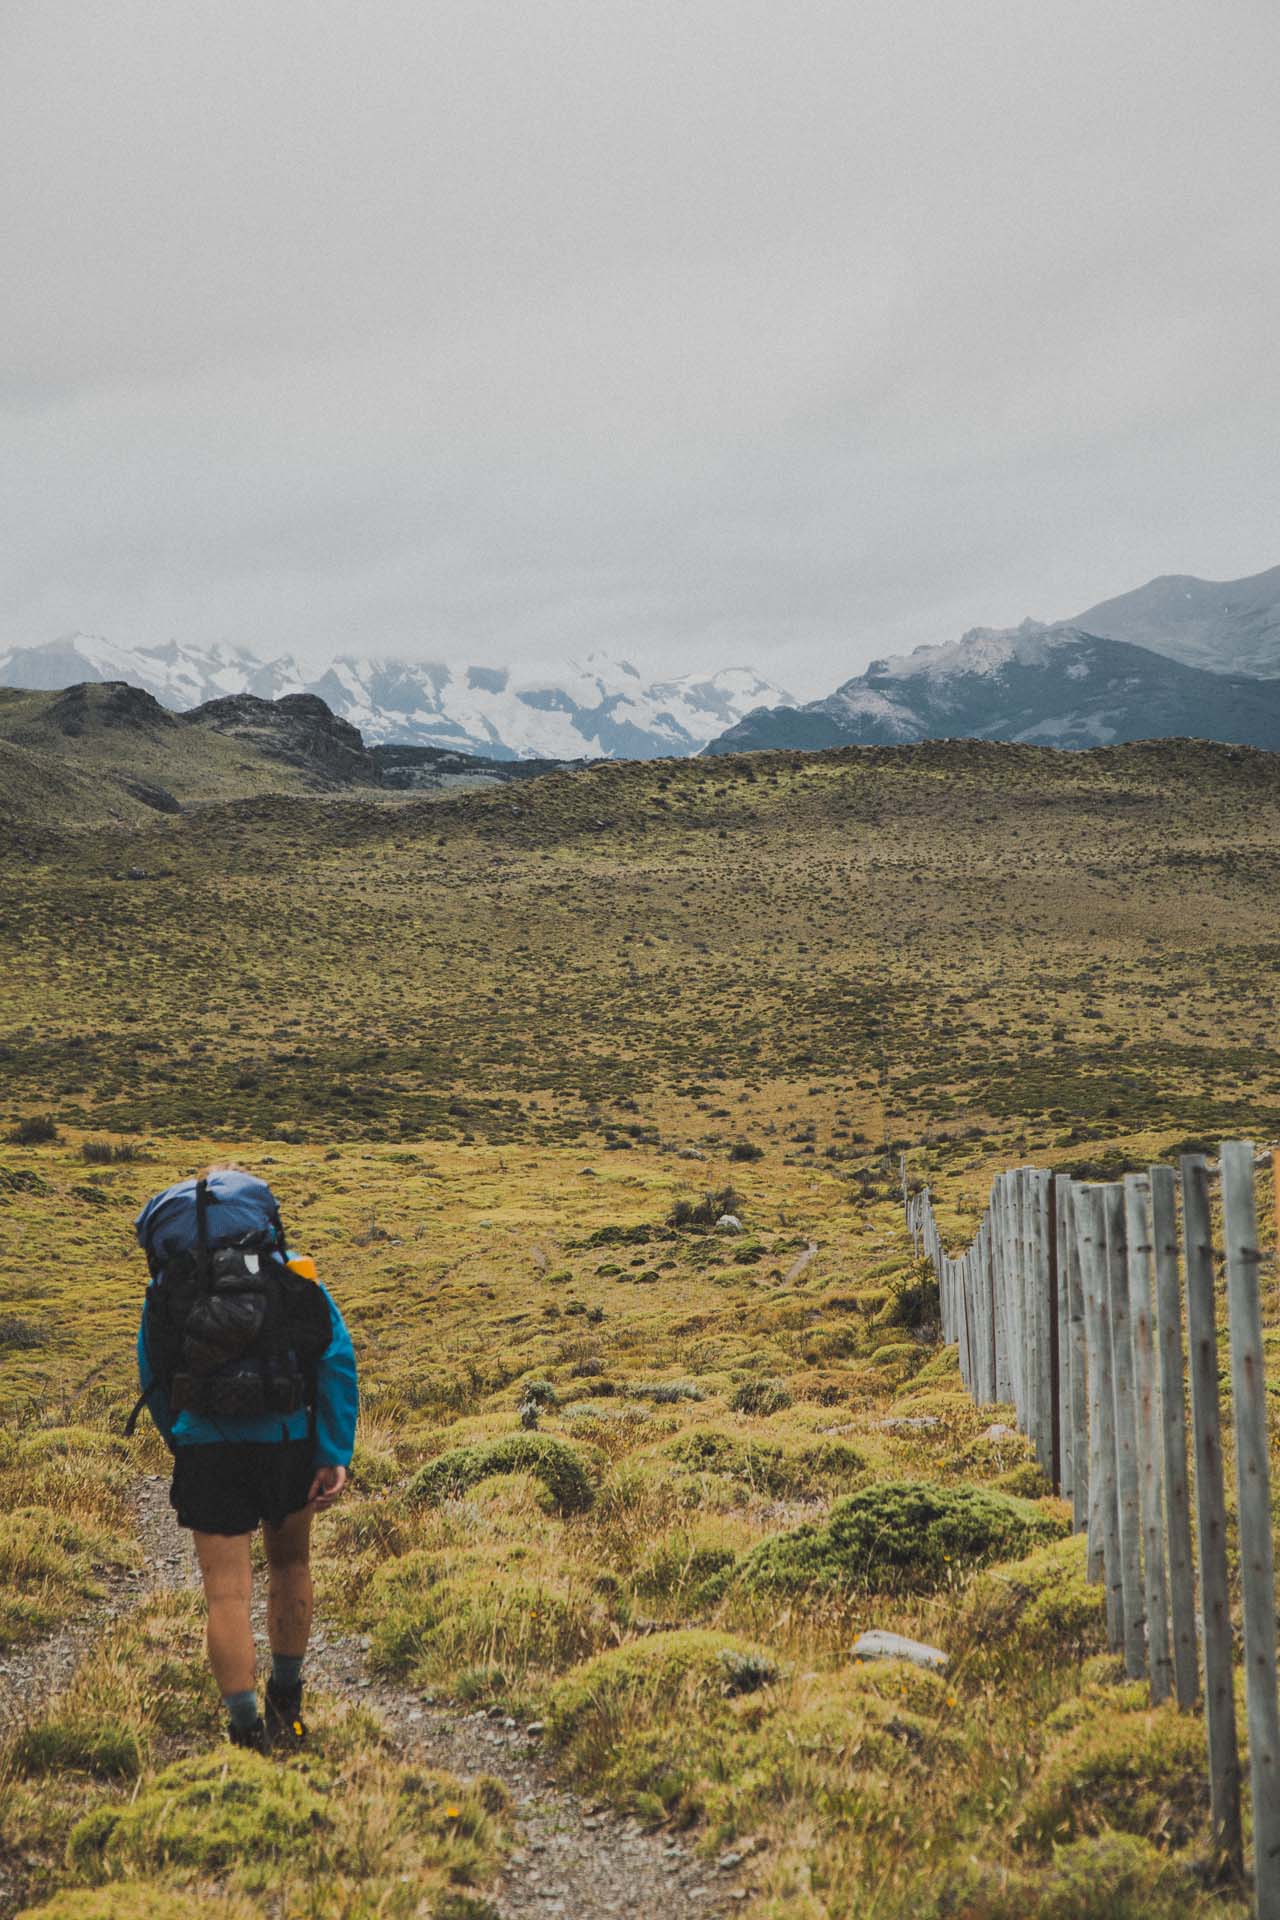
After the tirolesa action it‘s one or two more small hills and a very long very straight stretch back into Chaltén.
Conclusion
Compared to the other hikes we did in Patagonia, the Huemul Circuit is special in several ways.
It‘s probably the one trek where at least some experience is required. It is not particularly dangerous per se, but it could be, if you misjudge your fitness, the terrain or the weather. Possibly as a result of this, we got the feeling that national park officials are not too happy about loads of people doing the trek. Which makes sense, because they will get the odd inexperienced hiker, who gets themselves in trouble and rescue missions require manpower and they‘re expensive.
I am mentioning this, because it‘s such a vastly different approach to, for example, Torres del Paine. Torres del Paine is a fully commercialized and well organized operation that wants to attract as many people as possible. I‘m not saying one is better than the other, it just makes the Huemul Circuit feel like more of an adventure. It’s more remote, maybe a bit dangerous, you‘re fully self-supported… if that‘s your thing, go for it!